



At 11 p.m., this is rarely a theory problem. The pump is humming, maybe beeping, your spouse looks uncomfortable, and you're staring at a dial that doesn't tell you whether it should sit lower for a lighter body or higher for a heavier one. Most caregivers assume they're choosing a comfort setting. They're not. They're balancing therapy.
A low air loss surface has two jobs at once. It has to support the body well enough to reduce loading over bony areas like the sacrum and heels, and it has to move enough air at the skin surface to help manage heat and moisture. If you only chase softness, you can end up with bottoming out. If you only chase firmness, you can suspend the body on a hard-feeling air surface that defeats pressure redistribution.
That's why low air loss mattress settings need a more practical approach than “set it where it feels good.” What matters is whether the patient is supported, whether the skin stays drier, and whether the setup still works after sheets, pads, and positioning changes.
Why the Right Low Air Loss Mattress Setting Matters
The biggest mistake I see at bedside is treating the control unit like a recliner remote. A low air loss mattress isn't just there to make the bed feel softer. It's a therapeutic support surface, and the setting only works if it matches the patient in the bed.
Clinical literature defines low-air-loss mattresses as surfaces made of air-filled cells with small holes that blow air to dry the skin. That design matters because low air loss is not just about pressure. It's also about skin climate. In pooled randomized trial data, low air-loss beds reduced pressure-ulcer development compared with standard hospital beds, with a relative risk of 0.33 (95% CI 0.16 to 0.67) in those studies, reported in a Canadian health-technology assessment summarized at PubMed Central.
Two setting failures that look opposite
An underinflated surface lets the pelvis sink too far. At the sacrum, that means the patient can bottom out against the bed frame or the compressed lower structure of the mattress. The surface may feel plush, but the therapy has failed.
An overinflated surface creates a different problem. The cells become so firm that the patient rides “on top” of the mattress instead of immersing into it. Pressure redistribution gets worse, and the skin can still get hot and damp if the bedding blocks airflow.
Practical rule: If the mattress feels comfortable but the sacrum is nearly on the frame, it's too soft. If it feels supportive but the body barely immerses, it's too firm.
What the setting needs to do in real life
At home, the right setting has to survive ordinary care. The patient gets turned. Pads get added. Someone raises the head of the bed. Weight shifts toward the foot section. Every one of those changes can alter support.
That's also why skin prevention at home has to be broader than the mattress alone. If you're building a full routine, DME Superstore's guide on how to prevent bed sores at home is worth reading alongside your setup.
A good setup does three things. It prevents bottoming out, preserves immersion, and keeps the skin environment drier. If one of those is missing, the dial needs attention.
What a Low Air Loss Mattress Actually Does
Low air loss gets lumped together with every “air mattress” on the market, and that confuses caregivers fast. In clinical terms, a low air loss surface uses air cells for support and pushes a small amount of air through the surface to help reduce heat and moisture at the skin.
That is different from a basic foam mattress, which only provides passive immersion, and it's different from a true alternating-pressure surface, where groups of cells inflate and deflate in cycles. Some systems combine both technologies, which is why a caregiver can hear airflow and also notice shifting support patterns.
What you're actually adjusting
On most systems, the user controls one or both of these:
- Cell pressure or firmness: This changes how the body immerses into the surface.
- Airflow or air-loss rate: This affects microclimate control at the skin interface.
The problem is that many people use the firmness control as if it also fixes sweating, damp skin, or heat. It doesn't. Pressure support and microclimate management are related, but they are not the same thing.
For a plain-language overview before you get technical, DME Superstore's article on what a low air loss mattress is is a useful starting point. For a broader consumer comparison of pressure-relief surfaces, Tip Top Furniture's mattress guide also helps frame where these systems fit.
Surface Type Comparison
| Surface Type | Pressure Redistribution | Shear Control | Microclimate Control |
|---|---|---|---|
| Standard foam | Passive only | Limited | Minimal |
| Alternating pressure | Active cyclic redistribution | Can help when properly set | Variable by model |
| Low air loss | Support through air cells | Depends on immersion and positioning | Strongest when vents are unobstructed |
| Combined alternating pressure and low air loss | Active redistribution plus airflow | Often better than single-mode surfaces when properly matched | Better than alternating pressure alone |
Low air loss is best understood as a microclimate-capable support surface, not a magic pressure solution.
That distinction changes how you set it. If the patient's main problem is moisture, sweating, drainage, or heat at the skin surface, airflow matters more. If the main problem is poor immersion over bony areas, firmness matters more. Many patients need both, but not in the same proportion.
Setting Up the Mattress Step by Step
Physical setup comes before fine-tuning. If the pump is mounted poorly, the tubing is strained, or a CPR valve isn't seated, the best dial setting in the world won't hold.
Start with the hardware
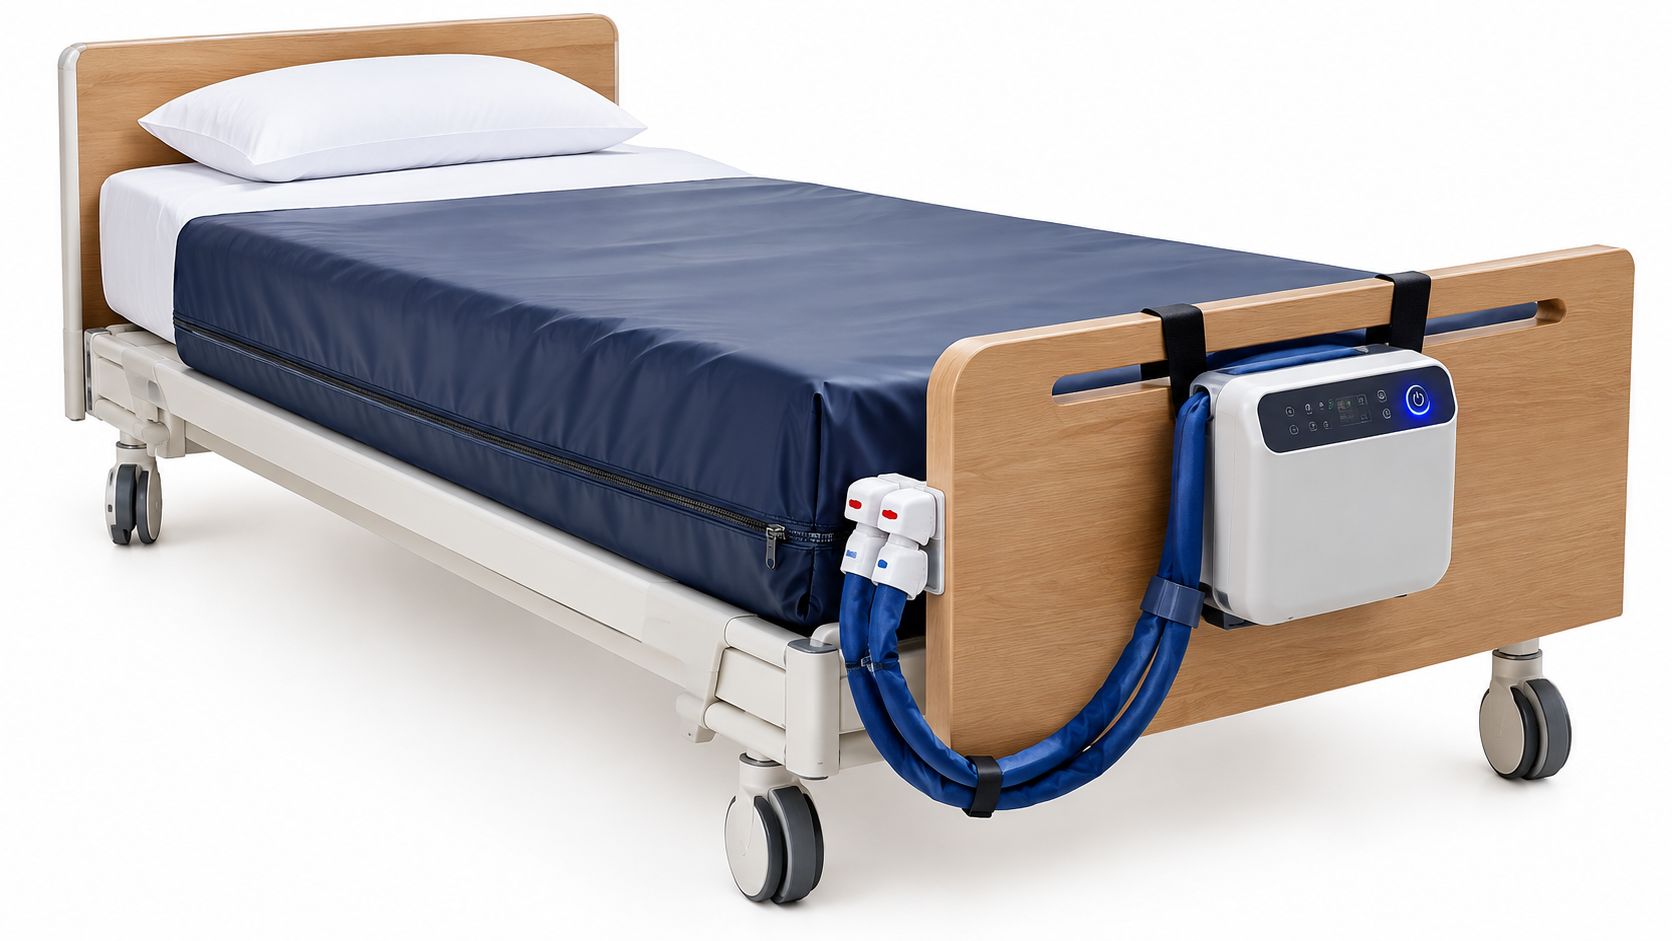
Set the pump where the manufacturer intends, usually hanging from the footboard or placed securely so the hoses don't kink. Connect the air tubes fully. Check the CPR connection or deflation valve if your system has one. Zip or secure the cover completely so the top layer lies flat.
Then power the unit on and let it come up to operating condition before you judge it. One manufacturer manual for a low air loss system specifies a two-hour warm-up before pressure checks and lists target cell pressures of 25.0 ± 2.0 mm Hg for the lower cell, 5.5 ± 2.0 mm Hg for the foot cell, and 12.0 ± 2.0 mm Hg or 32.0 ± 3.0 mm Hg for the upper cell depending on firmness setting, in the Gaymar Stryker powered mattress manual.
Do the support check before chasing comfort
Once the mattress has stabilized, center the patient on the surface. Then do the sacral clearance check. Slide a hand under the sacral area and feel how close the body is to the base support.
A different low air loss manual gives a clear target: the optimal clearance under the sacral region is 25 to 40 mm, or about 1 to 1.5 inches, checked by sliding a hand beneath that area, as described in the Dyna-Form low air loss operation manual.
If the sacrum is nearly on the bottom structure, raise the pressure one increment. If the patient is barely immersing and the surface feels taut under the pelvis, lower it one increment.
Use the dial the way manufacturers intend
Some systems use a simple comfort knob. Others use plus and minus buttons. Some allow pressure changes in 5 mmHg increments with multiple pressure levels, while others ask you to set by weight first and then adjust stepwise to comfort. One combined alternating-pressure and low-air-loss manual also recommends a bedside test where four fingers should just fit beneath the mattress under the buttock area after a ten-minute wait, while noting that final adjustment should follow weight distribution, not body weight alone, in the Graham-Field manual.
If you're comparing system styles before setup, DME Superstore's overview of medical air mattresses helps sort out control layouts and therapy types.
A quick visual refresher can also help if you're setting one of these up for the first time:
Confirm microclimate, not just firmness
After the support check, pay attention to the skin environment. You should usually notice gentle airflow at the surface vents or through the cover design, depending on the model. The patient shouldn't feel clammy soon after lying back down unless linens or pads are trapping moisture.
If the bed feels soft but the patient's back is damp, the setup still isn't right.
Adjusting Settings by Body Type and Risk Level
The control setting is a starting point, not a diagnosis. Two patients with the same body weight can need different low air loss mattress settings because tissue distribution, contractures, trunk wounds, edema, and repositioning tolerance all change how the body loads the surface.
Clinical and nursing guidance also puts low air loss in a specific lane. It's used primarily for microclimate control, and guidance recommends it for high-risk patients such as those with a Braden score of 12 or less, multiple trunk wounds, or severe repositioning limits, according to the iWOCN nursing resource on bed surfaces.
Match the setting to risk, not comfort alone
If the patient has very high risk, poor mobility, moisture problems, or mechanical ventilation, I lean toward more aggressive microclimate support and a careful sacral clearance check at a softer therapeutic setting. If the patient is lower risk and still shifts independently, one step firmer often gives better stability for transfers and less sliding.
The danger is assuming “softer is always safer.” It isn't. A softer setting can reduce support enough to let the pelvis sink too far, especially after pads or extra linen are added.
Starting Settings by Braden Score and Body Type
| Risk Level (Braden) | Body Type | Firmness Position | Airflow Level |
|---|---|---|---|
| 12 or less | Thin or cachectic | Start softer, then verify sacral clearance carefully | Higher microclimate setting if moisture is present |
| 12 or less | Average build | Mid-soft therapeutic setting, then hand-check | Moderate to high based on skin moisture |
| 12 or less | Higher body weight | Increase support incrementally to avoid bottoming out | Moderate to high if sweating or incontinence is present |
| Above 12 with limited moisture burden | Thin or average build | Slightly firmer if immersion remains adequate | Lower to moderate |
| Above 12 with good mobility in bed | Average or larger build | Firmer support often improves stability | Lower unless heat or moisture is a problem |
Special body-type cautions
Very thin patients can fool caregivers. Bony prominences press more sharply into the air cells, so the mattress may seem supportive when the sacrum is too close to the base. Check with your hand, not your eyes.
Heavier users need another kind of caution. More weight often means a firmer support setting is necessary, but the answer isn't to crank the dial blindly. One manufacturer manual specifies 3 to 4 inches (7 to 10 cm) of clearance between the patient and bed frame and says to adjust comfort until the patient is fully supported without bottoming out, while also warning that added linens and pads can significantly increase interface pressure on low-air-loss surfaces, in the Select-Air manual.
Bedside judgment: If a heavier patient feels steadier after you increase firmness one notch, that's useful. If the pelvis rises but the skin gets hotter and the body stops immersing, you've gone too far.
Bedding Choices That Protect the Setup
Most home failures don't start with the pump. They start with bedding. A carefully adjusted surface can lose a lot of its value after someone adds a fitted sheet, a washable pad, a disposable pad, and a draw sheet because “it seemed cleaner.”
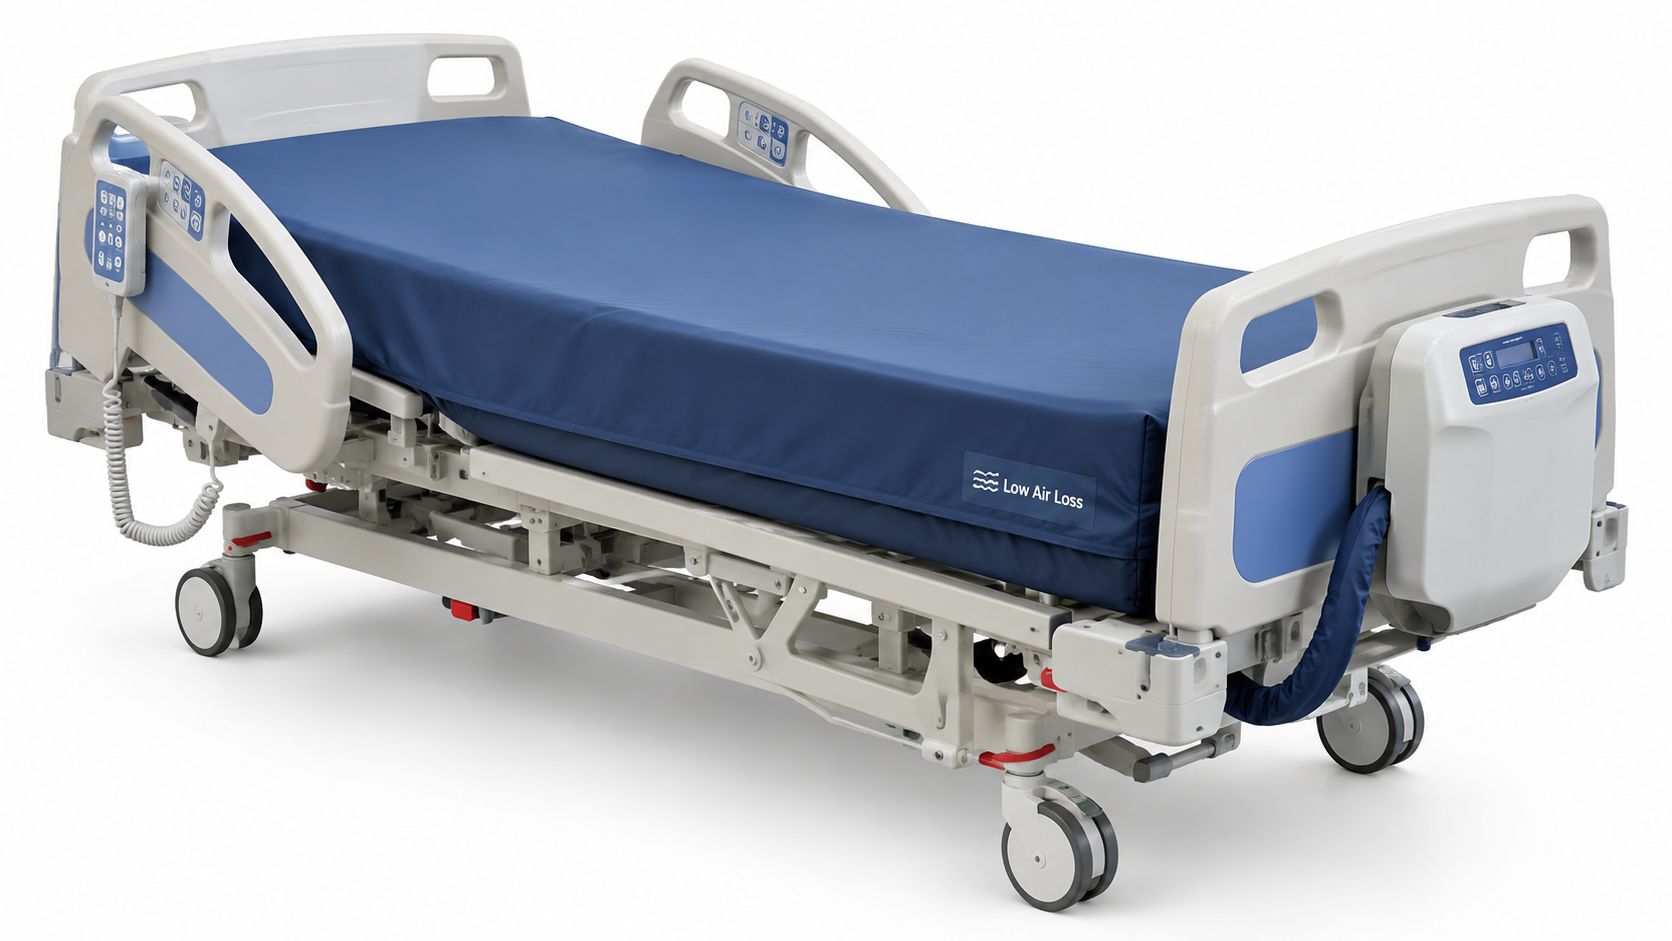
Low air loss works best when the top surface can still move air and when the body can still immerse into the cells. Clinical guidance aimed at practice points out that minimal linens are recommended because they can interfere with microclimate management, and breathable, fluid-wicking pads are preferred, as discussed in the guidance summary on the 2026 pressure-injury guideline commentary. That source also notes the evidence certainty remains very low and that low air loss is especially relevant when heat and moisture at the skin interface are contributing factors.
What usually works better
- Use one primary sheet layer: Stretchy, breathable sheets generally preserve surface function better than heavy tucked cotton layers.
- Choose a fluid-wicking pad when needed: If the patient is incontinent, use a breathable pad designed not to block airflow.
- Skip stacked pads: Layering traps heat, reduces immersion, and changes the support check you already did.
If you're also trying to think through cooling and moisture-control accessories more broadly, this cooling mattress pads guide from Protect-A-Bed is a helpful comparison point, especially for understanding what helps airflow and what just adds bulk.
For caregivers buying linens for adjustable or hospital-style sleep surfaces, DME Superstore's article on what size sheets fit a hospital bed helps with fit, which matters more than people expect.
What doesn't work
A waterproof layer with poor breathability can cancel out the mattress's main microclimate benefit. Tight top sheets tucked hard under the mattress can also create drag and shear during turns.
And no, the mattress does not replace turning.
Troubleshooting Pump and Alarm Issues
When a pump alarms at night, people may assume the unit is failing. Sometimes it is. More often, the system is telling you the setup changed.
Low-pressure alarms
A low-pressure alarm should make you check the obvious first.
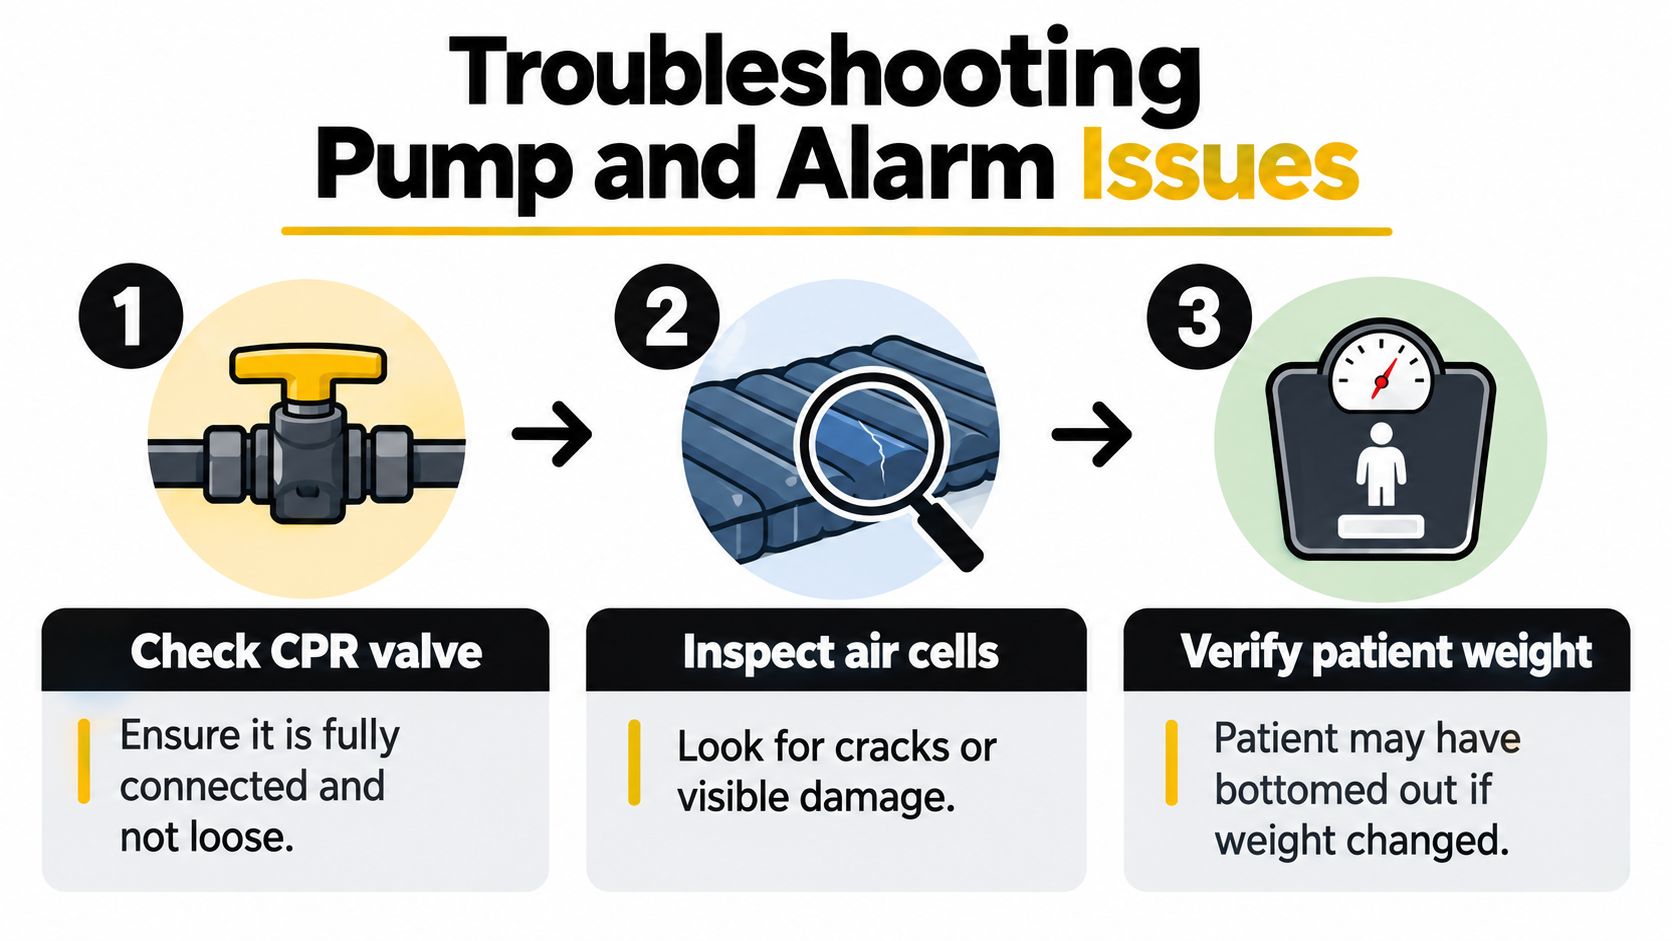
- Look at the CPR valve: If it's loose or partly open, the system can't hold pressure.
- Check the tube connections: A connector can look attached and still leak.
- Reassess position in bed: If the patient has slid toward the footboard, the lower cells may be overloaded differently than when you set the bed.
If the patient recently gained weight, developed edema, or is now spending more time upright in bed, bottoming out can appear even though the old setting used to work.
High-pressure or persistent alarm issues
A high-pressure alert can come from a kinked hose, a compressed mattress edge, or prolonged upright sitting that changes load across the cells. If side rails or bed hardware are pressing into the mattress edge, fix that first.
If the unit gives a power-loss or service-type alarm, do a full power cycle. Turn it off, wait briefly, then restart. If the fault repeats, inspect the filter and hose path, and check for visible damage to the cells or connectors.
What to document
Write down the time, alarm type, patient position, and current setting. Recurring patterns matter. If the alarm happens after every evening turn or after head-of-bed elevation, that points to setup or positioning, not random pump behavior.
A pump that only alarms “sometimes” is often giving you a clue about when the patient is losing support.
For caregivers comparing surface types after repeated issues, DME Superstore also offers low-air-loss and alternating-pressure systems in its product catalog, which can matter if the current support surface doesn't match the care situation.
Daily Care Checklist and When Low Air Loss Is Not Enough
Daily maintenance should be boring. That's the goal. The less dramatic your mattress routine is, the more likely the surface is doing its job.
Daily bedside checklist
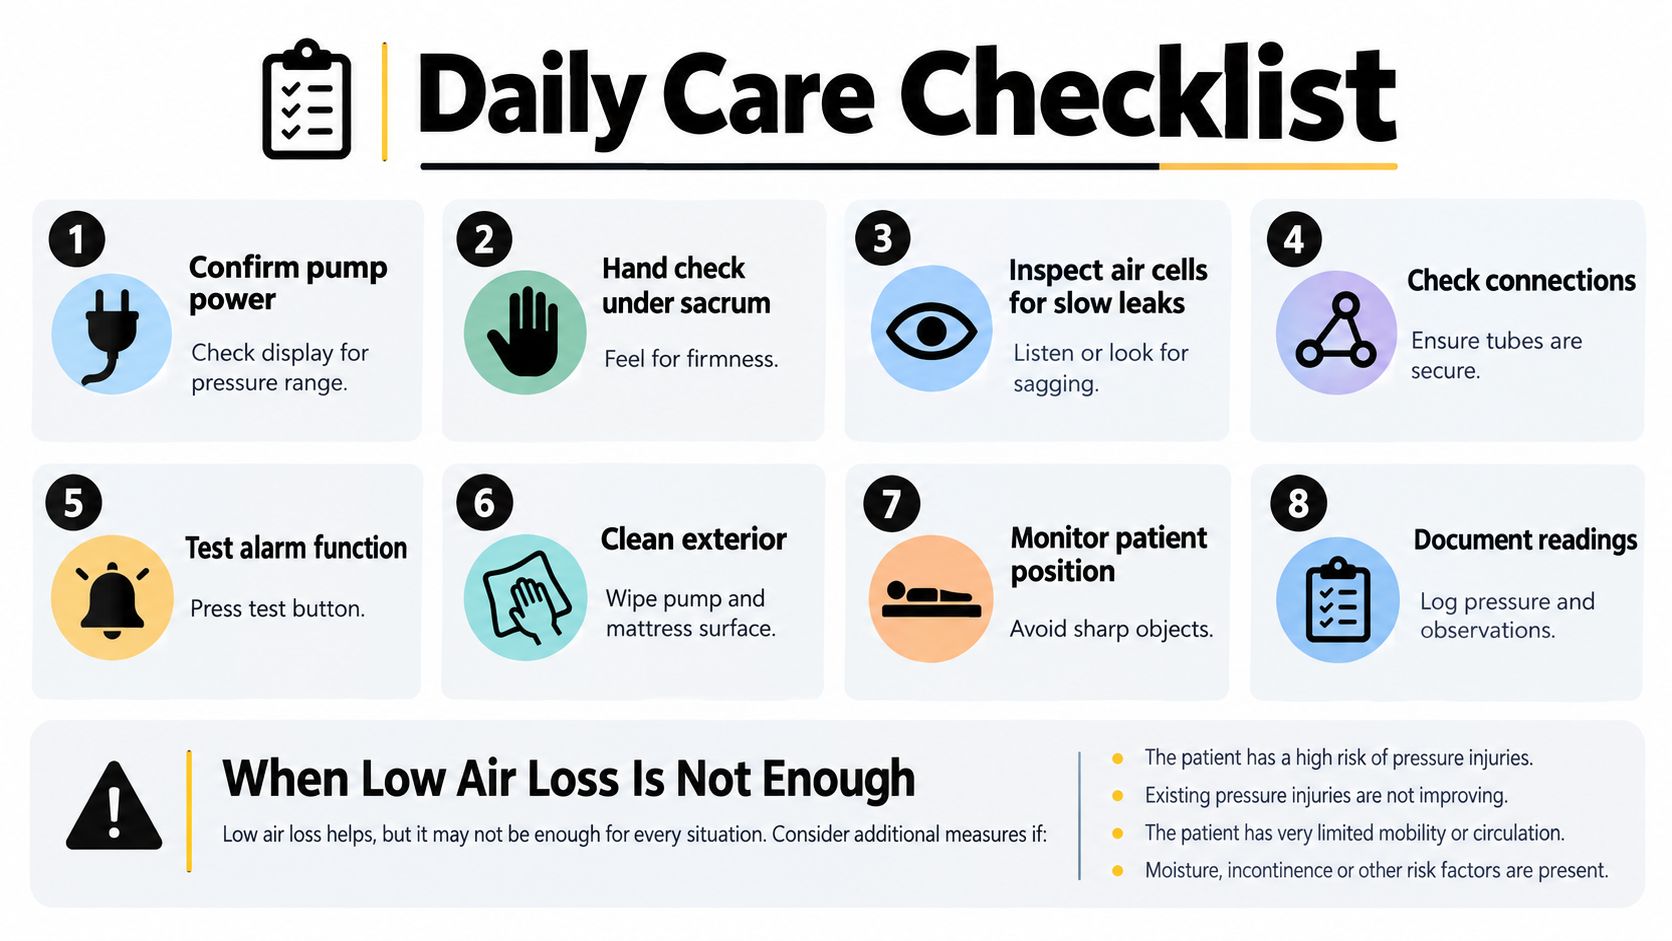
- Confirm power: Make sure the pump is on and functioning when the day starts.
- Repeat the sacral hand check: Support can change after repositioning or bedding changes.
- Inspect for slow leaks: Sagging cells or a new soft spot matter.
- Check tubing and valves: A partly loosened connector can mimic mattress failure.
- Clean the exterior surfaces: Follow the cover and pump cleaning instructions from the manufacturer.
- Watch patient position: Sliding down in bed changes loading.
- Track alarms and changes: A simple written log is useful.
- Reassess the turning plan: Low air loss helps. It doesn't replace repositioning.
Know when the mattress is the wrong answer
Evidence on low air loss is mixed and very dependent on patient selection. A Cochrane review found only a few trials evaluating low-air-loss beds and rated the evidence very low quality, while a large elderly hip-fracture cohort found no lower overall incident pressure-ulcer rate with powered pressure-redistributing surfaces overall, though a benefit signal appeared in the bedbound subgroup with an incidence rate ratio of 0.3 (95% CI 0.1 to 0.7), as summarized in the AHRQ review hosted by NCBI Bookshelf.
That lines up with bedside reality. Low air loss is usually a better fit when moisture burden is high, repositioning is difficult, or ventilation and immobility create a hot, wet skin interface. It's not a cure-all.
A policy example from Aetna's clinical bulletin on support surfaces places low-air-loss beds in more severe cases, including stage III or stage IV ulcers, multiple large truncal ulcers, or patients who have already bottomed out on another support surface. If skin damage is progressing, if a wound is worsening, or if the patient needs more localized offloading than the surface can provide, it's time for wound-care reassessment, not another twist of the dial.
If you're still deciding between active surface types, DME Superstore's comparison of low air loss mattress vs alternating pressure mattress is a practical next read.
DME Superstore carries homecare support surfaces that fit directly into this kind of bedside decision, including alternating-pressure and low-air-loss mattress systems, adjustable beds, and related accessories that affect setup and daily use. If you're trying to match the right surface to body type, moisture burden, and caregiver routine, visit DME Superstore and compare the specs, compatibility details, and support options before you buy.
