



A wheelchair ramp for a side-entry van isn't a one-size-fits-all piece of equipment. It has to match your specific vehicle, handle the real-world load of the user and chair together, and provide solid edge protection and traction from day one. Before you commit to anything, focus on four non-negotiables: a 30-inch clear width, a 600-pound capacity, a 3:1 safety factor, and 2-inch minimum edge barriers.
Essential Safety Standards for Side Entry Ramps
These ramps are engineered mobility devices, not glorified planks. The ramp sees the combined weight of the wheelchair, the person in it, any caregiver assisting, and the extra force generated when wheels accelerate, brake, or pivot during entry and exit.
| Requirement | Minimum or Typical Target | Why It Matters |
|---|---|---|
| Clear ramp width | 30 inches | Allows safe wheelchair passage |
| Load capacity | 600 pounds | Covers user, chair, and equipment |
| Safety factor | 3:1 | Accounts for movement and impact forces |
| Edge barriers | 2 inches | Reduces the risk of a wheel rolling off |
| Doorway clearance | Verify vehicle measurements | Prevents contact during entry |
Don't just measure the door opening. Check the floor height and the ground where the ramp actually lands. A ramp that clears the doorway perfectly but jams against a curb, a neighboring car, or a sloped driveway still creates a hazardous boarding situation.
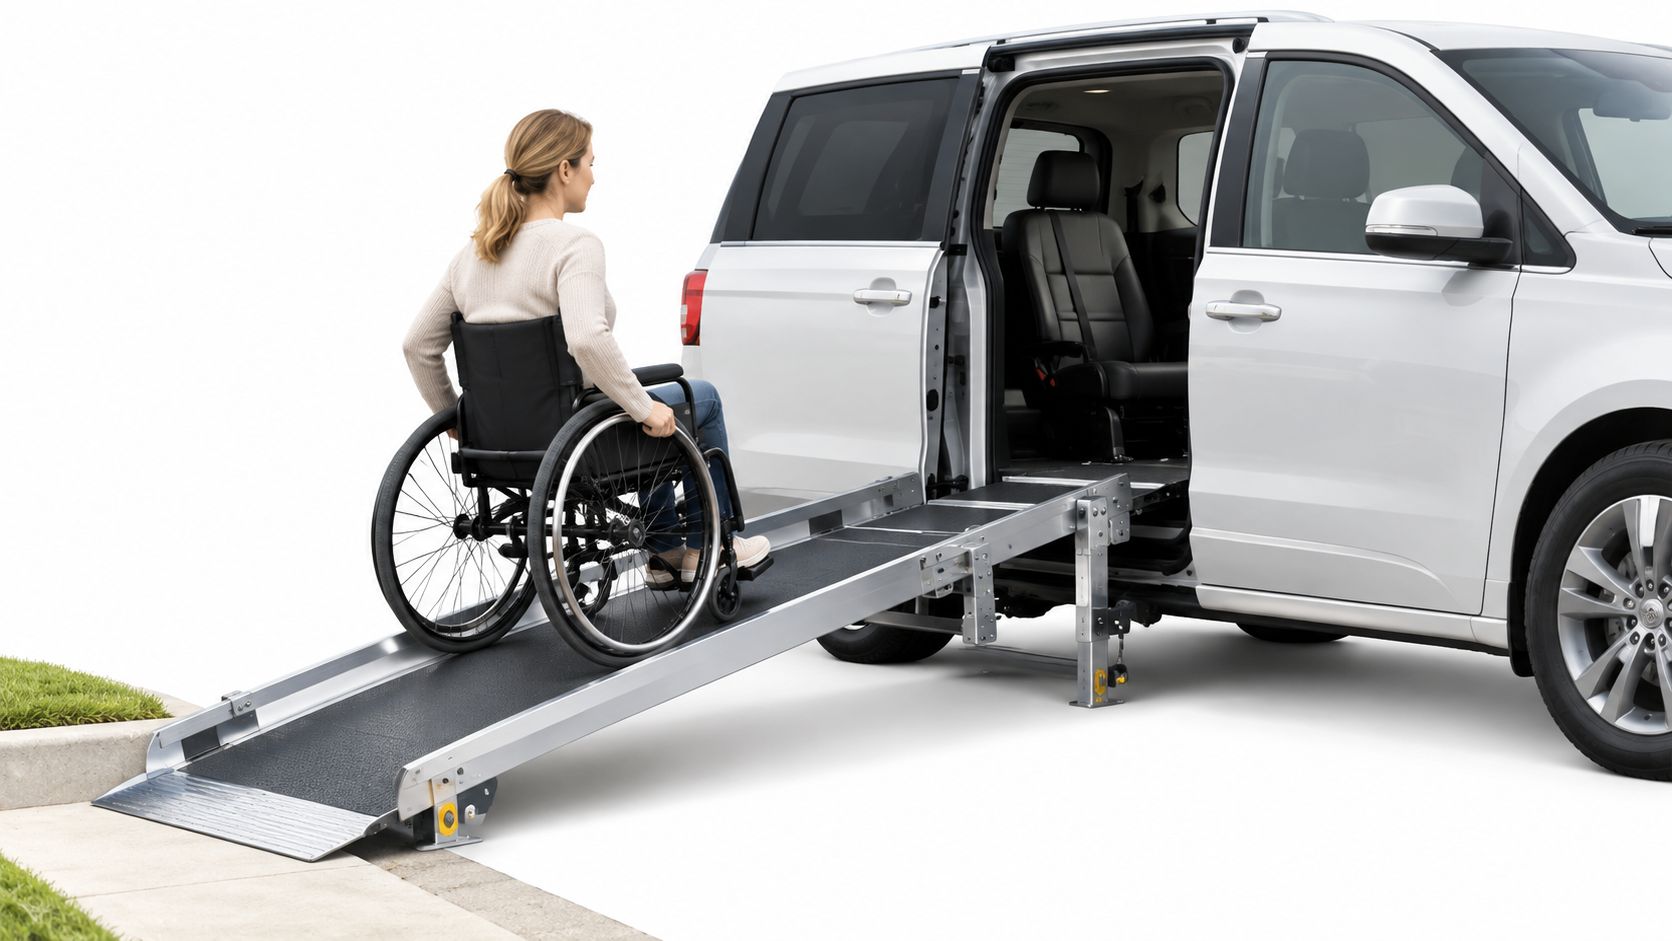
Why Side Entry Needs Extra Planning
Rear-entry ramps benefit from open space behind the vehicle. Side-entry ramps deploy right next to curbs, walls, other parked cars, and narrow driveways. That means clearance and positioning matter just as much as the ramp's structural strength.
A manual wheelchair rider often applies uneven force while ascending, and a caregiver pushing from behind adds more variable load. The rated capacity should comfortably exceed the total everyday load, not just barely cover the wheelchair's published weight.
Key takeaway: Never judge a ramp by looks alone. Confirm measurements, capacity, edge protection, traction, and vehicle compatibility before relying on it.
For a broader look at accessibility standards and safety factors, check out this guide to wheelchair ramp requirements and safety considerations before choosing your equipment.
A wheelchair ramp for van side door access tends to make everyday travel feel a little more natural, since the boarding process happens right from the curbside instead of behind the vehicle. In 2024, over 65% of personal wheelchair-accessible van conversions went with side-entry layouts, based on The Mobility Resource's breakdown of side-entry versus rear-entry configurations. That's not a coincidence — there are real, practical reasons people lean this way.
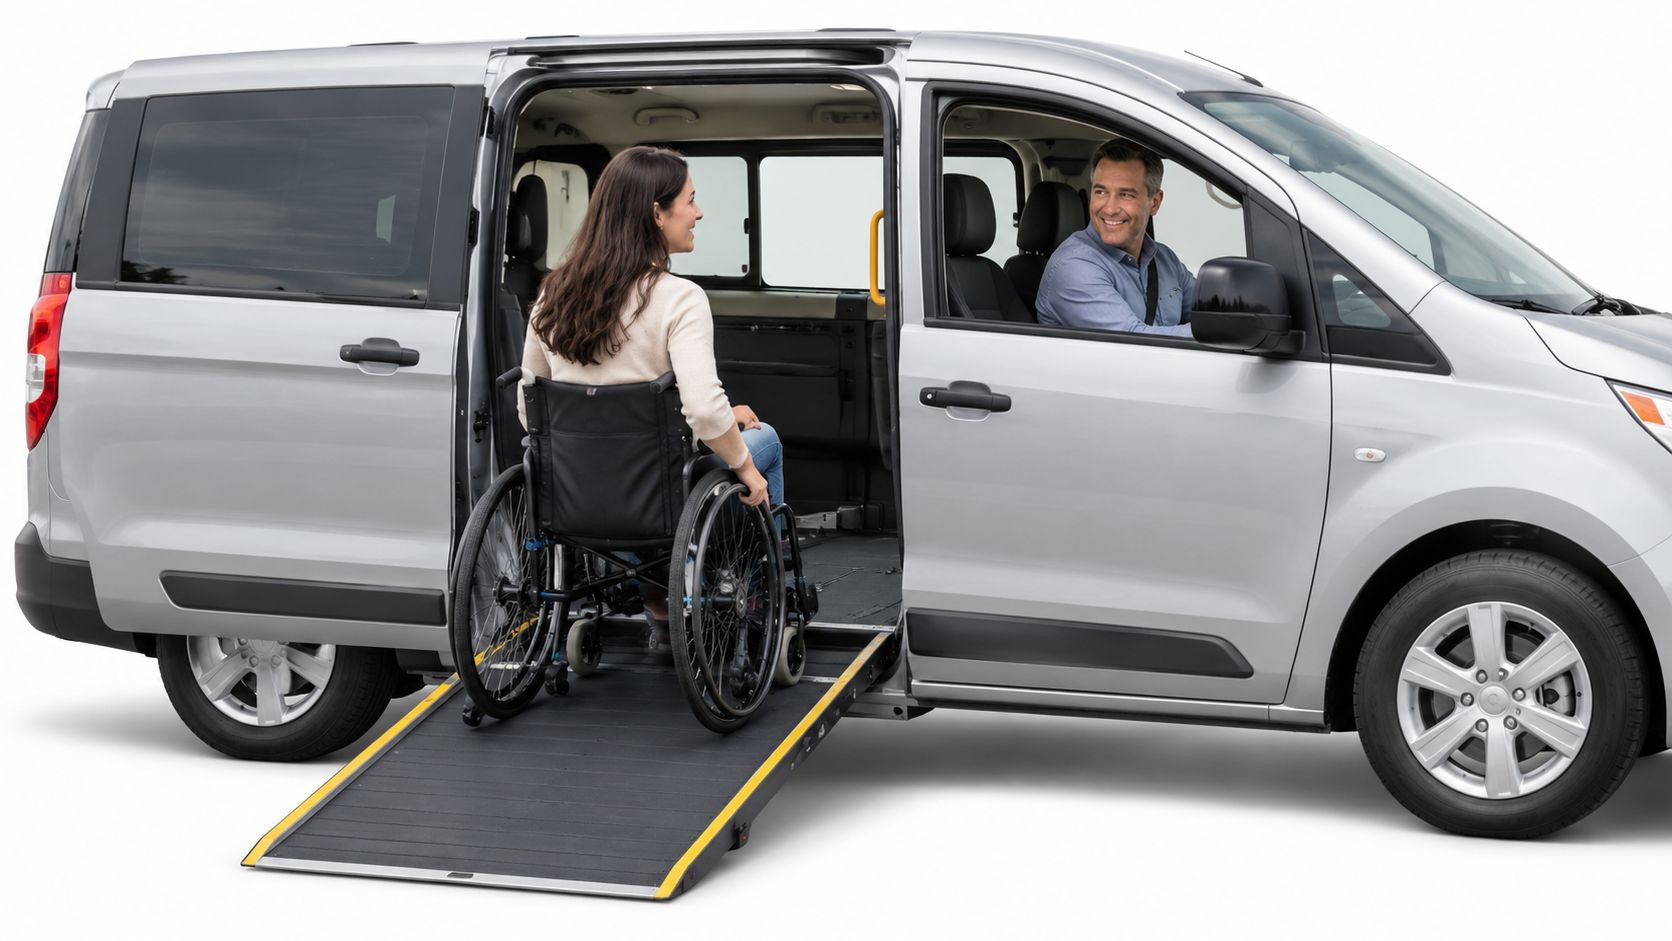
The biggest advantage comes down to geometry. A sliding side door paired with a lowered floor and a properly positioned ramp gives you a straight shot into the cabin. The wheelchair rider can sit closer to the front, keep an eye on what's going on outside, and actually have a conversation with whoever's driving. It just feels less isolating than climbing in from the back.
When Side Entry Actually Makes Sense
Think about where you'll park most days. If you're pulling up to a curb outside a doctor's office or clinic, side entry lets the ramp deploy directly toward the sidewalk. The rider stays clear of passing traffic, and you're not stuck trying to clear space behind the van while someone's trunk is inches from your bumper.
That said, side access isn't free of constraints. The van needs adequate room to open that door and deploy the ramp. A tight parking garage, a narrow driveway, or a neighbor parked too close can turn a quick stop into a puzzle. Before committing, scout the places you go most — your home garage, your workplace lot, the clinic parking area.
Side entry pays off most when curbside boarding, front-row seating, and giving the wheelchair user more independence matter more than squeezing into tight parking spots.
Here's where side-entry tends to shine in real life:
- Daily driving: Front access makes it easier for someone operating the vehicle independently, or for a caregiver to assist without craning around from the back.
- Medical visits: Rolling straight out onto the sidewalk at a clinic entrance beats backing out through traffic lanes every time.
- Riding with family: Seating arrangements tend to be more flexible, so the wheelchair user isn't parked in the far back away from everyone else.
- Garage or driveway parking: Measure those widths carefully. A few inches too narrow means you can't open the door far enough — and that's a daily frustration you don't want.
A couple of honest realities worth keeping in mind: side-entry conversions generally cost more because of the lowered floor and structural work involved. This is also a significant financial decision — Americans spend north of $2 billion a year on accessible van conversions, and the ramp is just one piece of that investment. Sit down with a dealer who knows the vehicle you're considering, walk through your parking situation and daily routine, and be realistic about how your mobility needs might shift down the road before signing anything.
Getting the measurements right makes the difference between a ramp that feels solid under your wheels and one that feels sketchy, steep, or just plain wrong. Start with the vertical rise from the ground up to the van floor—not from the curb. Even a seemingly modest floor height of 12.5 inches demands enough ramp length to keep things stable and prevent runaway momentum on the way down.
The longer the ramp, the gentler the incline. That's the basic rise-and-run relationship at play. A tape measure tells you how much horizontal space you've got beside the vehicle, while a digital level confirms the actual angle once the ramp is deployed.
Measure the Van Before Ordering
Park on flat ground and record these numbers with the van unloaded first:
- Floor rise: Ground to entry floor at the exact spot where the ramp will land.
- Doorway opening: Usable vertical clearance, not counting trim or any obstructions.
- Deployment space: Distance from the side door to the sidewalk, curb, or the next parked car.
- Interior clearance: Make sure the ramp can fold or extend without hitting seats, floor tracks, or the sliding door mechanism.
For compact vehicles, plan on at least 56 inches of doorway clearance. Full-size vans often need 68 inches to give taller riders or power chair users enough headroom and room to maneuver comfortably.
Measure the whole boarding path, not just the ramp itself. A perfectly calculated ramp length won't help if the doorway, parking space, or landing zone is too cramped.
Confirm Everything in Real Conditions
Once you've got baseline numbers, load the van the way it actually gets driven—passengers, equipment, the usual cargo. Extra weight compresses the suspension and drops the floor slightly, which changes the final ramp angle in ways that matter. Test the setup in the places you'll actually deploy: your driveway, the clinic parking lot, the garage.
For a more precise length calculation, try this handicap ramp calculator guide. Take readings at several locations, note the steepest result, and pick a ramp rated for that rise with the run you actually have available.
If the ramp barely clears the doorway or leaves you with no landing area, that's your signal to pause. A mobility-equipment specialist or experienced installer can check compatibility before you commit—much cheaper than returning an ill-fitting ramp.
The right wheelchair ramp for your van's side door comes down to a few practical factors: how often you're on the road, who's handling the setup, and how much room your vehicle actually gives you. Folding, telescoping, threshold, and permanent setups each tackle a different problem, so there's no single best option across the board.
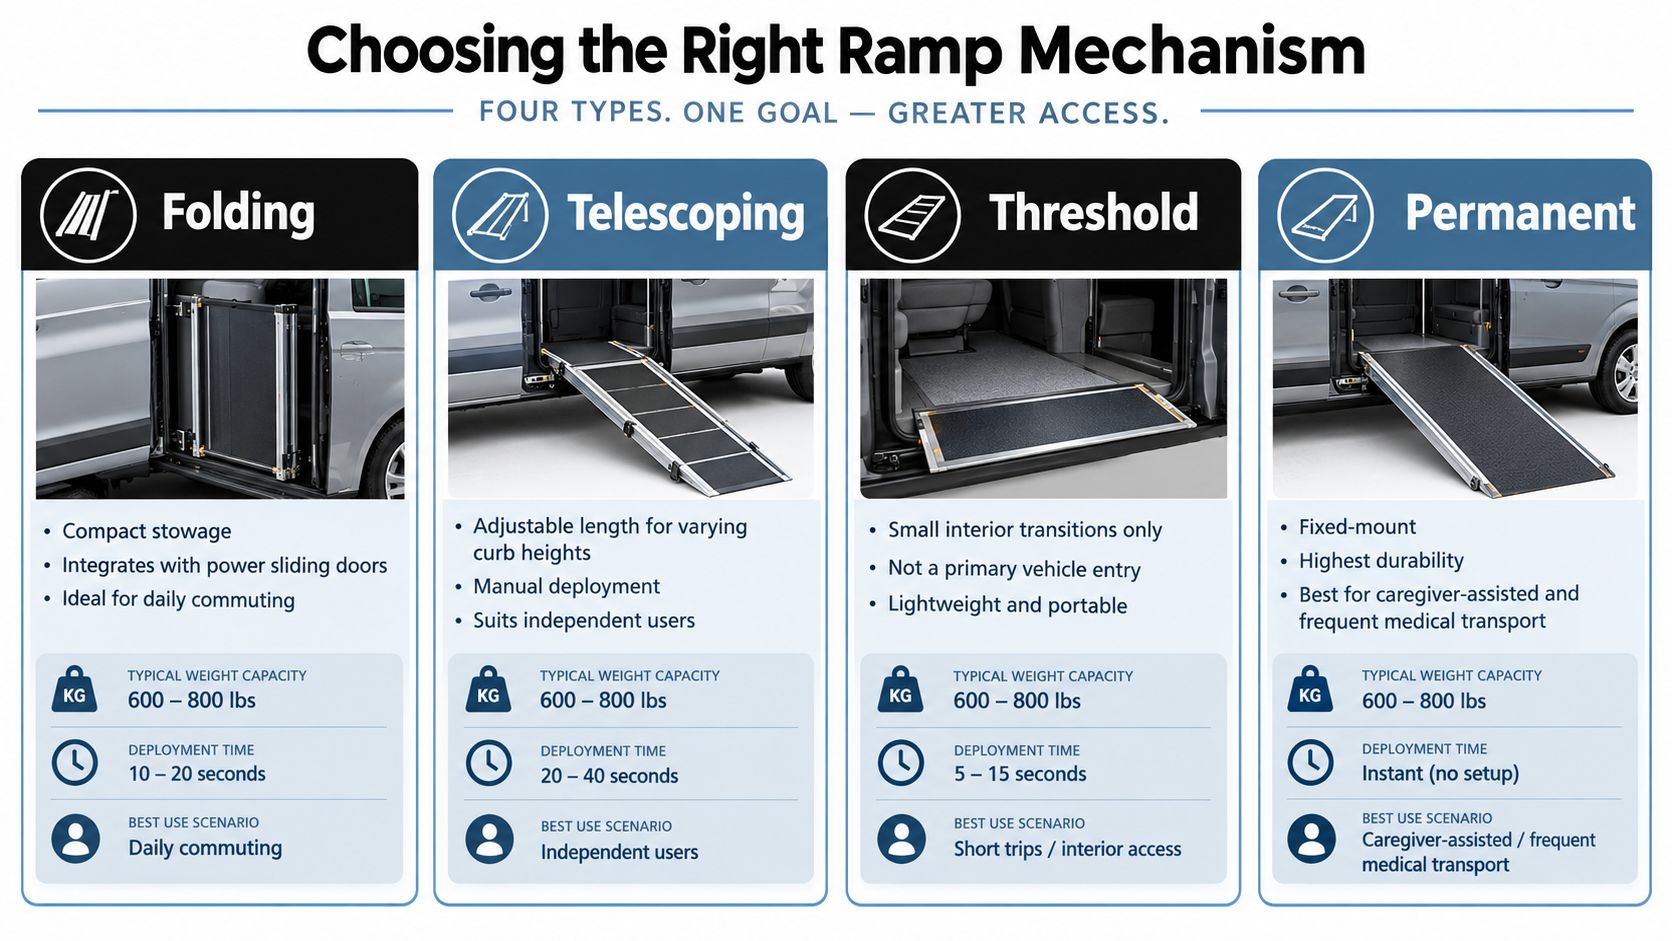
This comparison breaks down how the four main mechanisms stack up in terms of stowage, deployment, weight capacity, and the scenarios where each one shines. The quick takeaway: folding ramps win for everyday convenience, telescoping models give you flexibility with varying curb heights, threshold ramps are only for small lip transitions, and permanent systems deliver the most durability over time.
Match the Mechanism to the Routine
Folding ramps make sense for daily commuting. They tuck away compactly and can sync up with power sliding doors. A fold-in-half design lets either the wheelchair user or a caregiver deploy the ramp without detaching it from the van, assuming the doorway clearance and interior layout allow that kind of movement.
Telescoping ramps extend to multiple lengths, which is handy when curb heights or parking surfaces aren't consistent from one stop to the next. They work well for independent users who prefer manual control, but every section has to lock in squarely and stay aligned before rolling across.
Threshold ramps are lightweight and easy to move around, but they're not meant to be your primary vehicle-entry solution. They're designed to handle a small lip at the van threshold or inside a doorway, not to bridge the full gap from the pavement to the vehicle floor.
Permanent ramps bolt directly to the vehicle and tend to hold up best over years of regular use. They're usually the smarter choice for frequent medical transport or caregiver-assisted boarding, though the fixed hardware does eat into your cargo and passenger flexibility.
| Ramp type | Best fit | Main trade-off |
|---|---|---|
| Folding | Daily commuting | Needs interior storage clearance |
| Telescoping | Changing curb heights | Requires careful manual setup |
| Threshold | Minor transitions | Not suitable for vehicle entry |
| Permanent | Frequent transport | Less flexible for passengers |
Weight capacity still deserves attention. A lot of models land in the 600 to 800 pound range, but you need to account for the combined weight of the rider, the chair, and any equipment riding along. If you're weighing portable alternatives, this breakdown on choosing a portable wheelchair ramp is worth a look.
A wheelchair ramp for van side door access is only as dependable as its installation and upkeep. Anchor the ramp to approved structural points, never thin interior trim, and confirm every fastener matches the vehicle manufacturer's specifications.
Before the first trip, verify that tie-down points are tight, aligned, and free from cracks. The ramp should remain stable when the combined rider, wheelchair, and equipment load approaches the 600-pound rating, including movement forces covered by the earlier 3:1 safety factor.
Complete a Pre-Use Inspection
Caregivers should check the entire path before every boarding. Look for loose hardware, corrosion, bent sections, damaged hinges, and worn traction material.
- Confirm the slip-resistant surface is dry and clear of gravel, mud, ice, or medical equipment.
- Inspect both edge barriers, ensuring the required 2-inch protection remains secure and intact.
- Test locks, latches, and tie-downs before placing weight on the ramp.
- Keep fingers, feet, and clothing away from folding joints and powered mechanisms.
Here's the thing: a ramp that seems rock-solid on flat pavement might behave differently on a sloped clinic driveway or uneven parking lot. Deploy the ramp on the surfaces you'll actually use, not just the garage floor. Once you know how it handles those real conditions, set up a written weekly walk-through and a more thorough monthly check.
Never board if the ramp rocks, slides, sticks, or shows structural damage. Move to a safe location and arrange repair first.
Maintain Moving Parts Safely
Lubricate hinges only with the product-approved lubricant, and wipe away any excess that could compromise traction. Telescoping tracks need regular cleaning so grit doesn't jam the extension mechanism. Power ramps deserve the same attention: test warning lights, manual releases, and emergency overrides according to the owner's manual on a set schedule.
Most caregivers can handle cleaning, visual inspections, and tightening accessible bolts without issue. But professional installation becomes the smarter call when the job involves drilling, floor reinforcement, electrical wiring, suspension modifications, or integrating with a power door. A botched mounting job can weaken vehicle structure, void warranties, or create a failure that won't show up until you're counting on the ramp most.
For budgeting context, read this guide to wheelchair ramp installation costs. Before taking delivery of the vehicle, ask for hands-on training, get written maintenance intervals, and verify that replacement parts and warranty support are readily available.
Can Existing Vans Be Retrofitted?
Many minivans and full-size vans can accept a wheelchair ramp for van side door access, but compatibility depends on floor height, sliding-door opening, suspension, and structural reinforcement. Ask an accessibility dealer to inspect the exact year, model, and trim before ordering.
For example, a ramp that fits a lowered-floor minivan may not clear an unmodified full-size van. Confirm the 30-inch clear width, doorway clearance, deployment space, and combined user-and-chair weight before installation.
How Do I Check Commercial ADA Compliance?
For commercial transportation, ask the installer for written specifications showing the ramp's clear width, edge protection, capacity, securement points, and safety testing. The equipment must also fit the vehicle without blocking exits or creating unsafe boarding angles.
ADA compliance applies to the complete vehicle and operating setup, not just the ramp.
Local requirements can differ, so have the finished installation reviewed by a qualified mobility professional.
Can Insurance or Financing Help?
Coverage varies widely. Medicare generally doesn't pay for vehicle ramps, although some private insurers, Medicaid programs, veterans' benefits, or state grants may help. Learn more about Medicare coverage for wheelchair ramps before budgeting.
Request a written estimate, then compare funding rules with FSA/HSA eligibility and available payment plans.
What If the Ramp Sticks?
Stop using it and check for debris, bent tracks, loose hardware, or misalignment. Clean telescoping channels, inspect hinges, and follow the manufacturer's lubrication instructions. If extension remains uneven, don't force it. A technician should examine the mounting and mechanism before the next trip.
DME Superstore can help you compare mobility equipment and compatibility details at DME Superstore.
