



The hardest part of caregiving often arrives without warning. Your loved one is sitting on the edge of the bed, the wheelchair is nearby, and you need to help them stand before their legs give way. Reaching for an arm or pulling on clothing may feel natural, but those actions give you poor control and can place both of you in danger. A properly selected patient transfer belt can create a more stable connection, provided you use it to guide movement rather than lift a person's body weight.
The most important question isn't whether a belt looks sturdy. It's whether the person can participate safely, bear at least some weight, follow directions, and tolerate pressure around the trunk. A belt can improve hand placement and control, but it can't turn an unsafe transfer into a safe one.
Understanding the Basics of Patient Transfer Belts
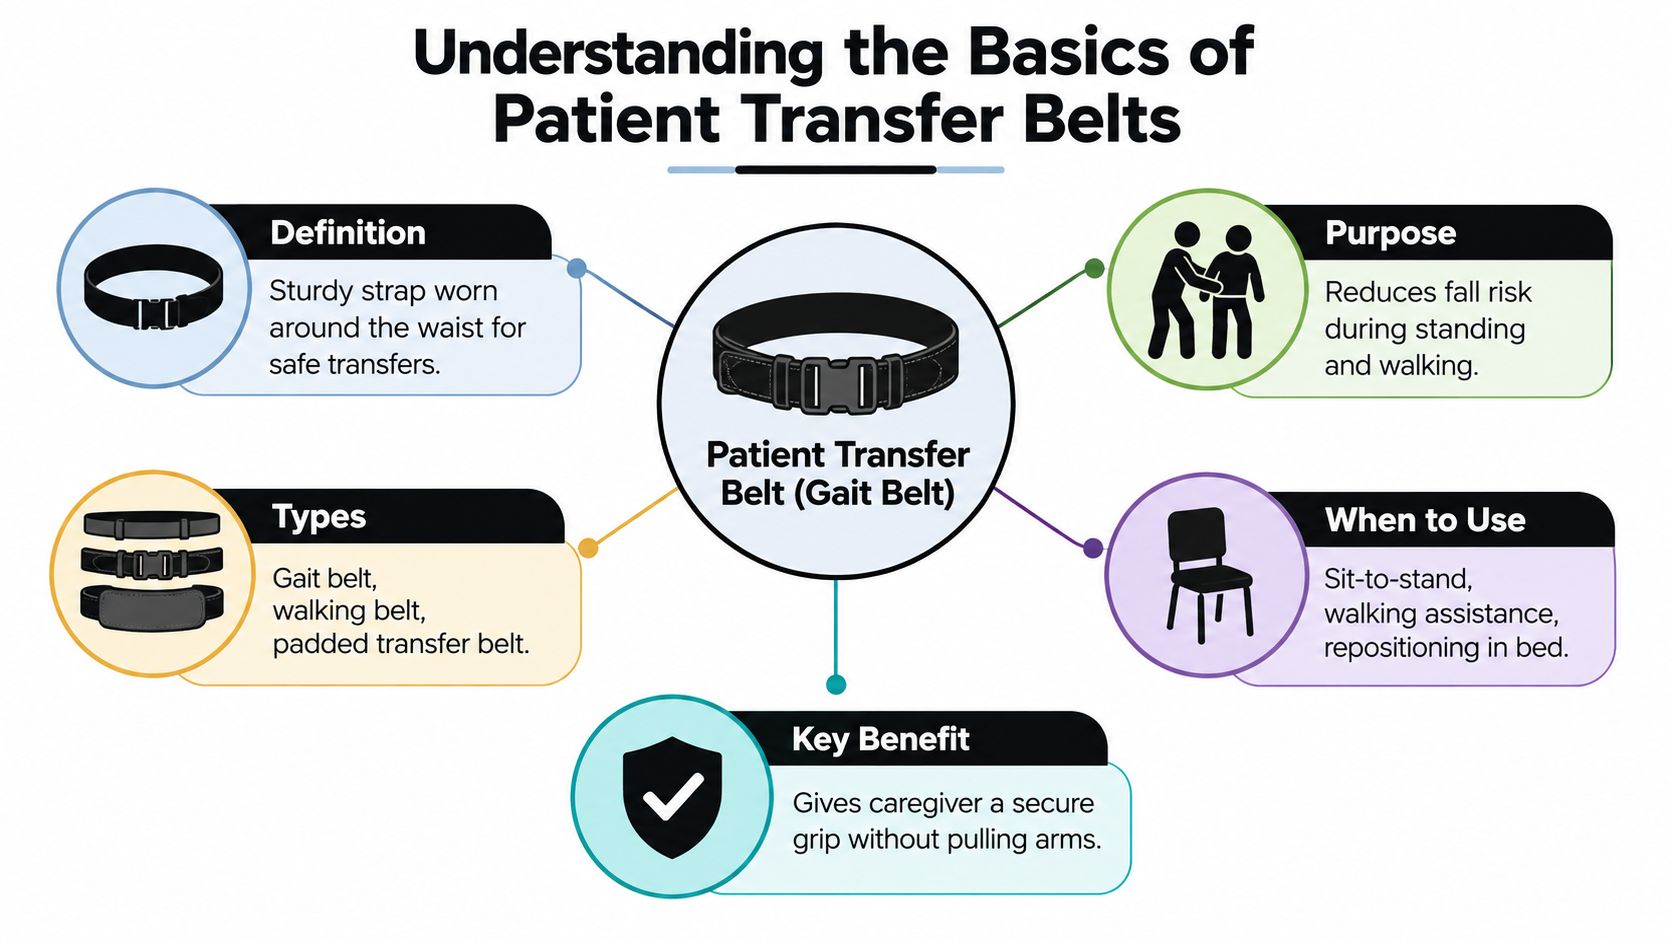
A patient transfer belt, often called a gait belt or walking belt, is a strap placed around a person's waist to help a caregiver steady and guide them during standing, walking, or transfers between nearby surfaces. It's a stabilization aid, not a sling. The caregiver holds the belt to maintain contact with the person's center of gravity while the person uses their own legs as much as possible.
Consider a common home-care moment. A family member can stand but becomes unsteady while moving from the bed to a chair. Without a belt, the caregiver may grab an arm, pull at a shirt, or reach awkwardly around the torso. With a correctly fitted belt, the caregiver has a predictable handhold that moves with the person's trunk. The caregiver still needs good technique, but the interaction becomes more controlled.
Guidance is different from lifting
A narrow gait belt is commonly used to guide assisted standing, ambulation, and pivot transfers. A wider walking belt may be designed for a pulling technique that changes how force is applied. Both can support control, but neither should be treated as a lifting sling.
A 2024 peer-reviewed review found that belts reduced non-neutral caregiver postures in five studies and reduced hand forces in another five studies, while one study found no difference in hand force (peer-reviewed biomechanical review). The evidence supports better positioning and hand contact, not unlimited lifting capacity.
Practical rule: If the person can't reliably assist, stop treating the belt as the answer. A mechanical lift or another assessed transfer method may be needed.
For broader home-safety planning, families may also benefit from this Rx360 guide to aging in place, especially when transfer difficulty is part of a larger mobility or home-layout problem. Before using any belt, review safe patient transfer techniques and match the device to the person's actual abilities.
Biomechanical Evidence and Belt Design Types
The design of a belt matters because lifting and pulling place very different demands on the caregiver. A conventional gait belt worn around the waist may help guide a person upward and forward, but caregivers can accidentally turn that movement into a manual lift. A wider walking belt may allow the caregiver to pull from a more favorable position while the patient contributes through the legs.
A 2018 biomechanical study compared these approaches during simulated bed-to-wheelchair transfers. Female caregivers required a mean force of 287 N when lifting with a gait belt, compared with 70 N when pulling with a walking belt (2018 biomechanical study). That difference doesn't make every walking-belt transfer safe, because the study used simulated patients and controlled tasks. It does show why the method of force application matters.
What the belt design changes
A conventional gait belt is often relatively narrow and works as a close handhold around the waist. It's useful when the patient can rise, balance, and follow directions but needs steadying. Handles may improve the caregiver's grip, yet they still shouldn't be used to suspend the patient.
A wider walking belt changes the contact area and can support a pulling technique during an appropriate transfer. The wider surface may also distribute contact more comfortably, but fit, placement, patient cooperation, and skin condition remain decisive. The belt's width doesn't compensate for a person who can't bear weight.
| Situation | More appropriate thinking |
|---|---|
| The person can stand and participate | Use the belt to guide and steady |
| The person needs substantial lifting | Reassess, because a belt may be insufficient |
| The person can't bear weight | Consider a mechanical lift or another assessed device |
| The person has pain, wounds, or fragile skin | Seek clinical guidance before applying pressure |
The practical lesson is simple: select the belt and technique based on where force should be applied, not just on how strong the strap appears. A patient transfer device guide can help families compare transfer aids, but a clinician should assess situations involving dependence, instability, or medical restrictions.
Proper Fit and Safety Guidelines for Caregivers
A belt only works as intended when it fits securely and the person can tolerate it. Start with an assessment, not with the buckle. Consider the person's weight-bearing ability, balance, cognition, cooperation, skin integrity, and any abdominal, chest, back, or respiratory condition that could make trunk pressure unsafe.
Assess before fastening
Ask whether the person can understand a simple instruction and respond consistently. Observe whether they can place their feet, lean forward, push through their legs, and remain upright with support. A person who is highly unstable, unable to cooperate, or unable to bear meaningful weight may need a different transfer method.
Place the belt around the waist over clothing or a gown, not directly against bare skin. Clinical nursing guidance says it should be snug enough to prevent upward movement while still allowing the caregiver to insert fingers between the belt and the patient (clinical nursing guidance).
Use the two-finger check
Fasten the buckle flat and position it so the patient can't easily release it during movement. Check that the belt lies smoothly rather than twisting into a narrow pressure point. You should be able to place two fingers between the belt and the person. If the belt shifts upward, it's too loose. If it causes pain, restricts breathing, or leaves no finger clearance, it's too tight.
Secure excess material so it can't catch on equipment or the caregiver's hands. Before moving, inspect the patient's face, breathing, and comfort. Stop if the person reports pain, numbness, swelling, unusual pressure, or difficulty breathing.
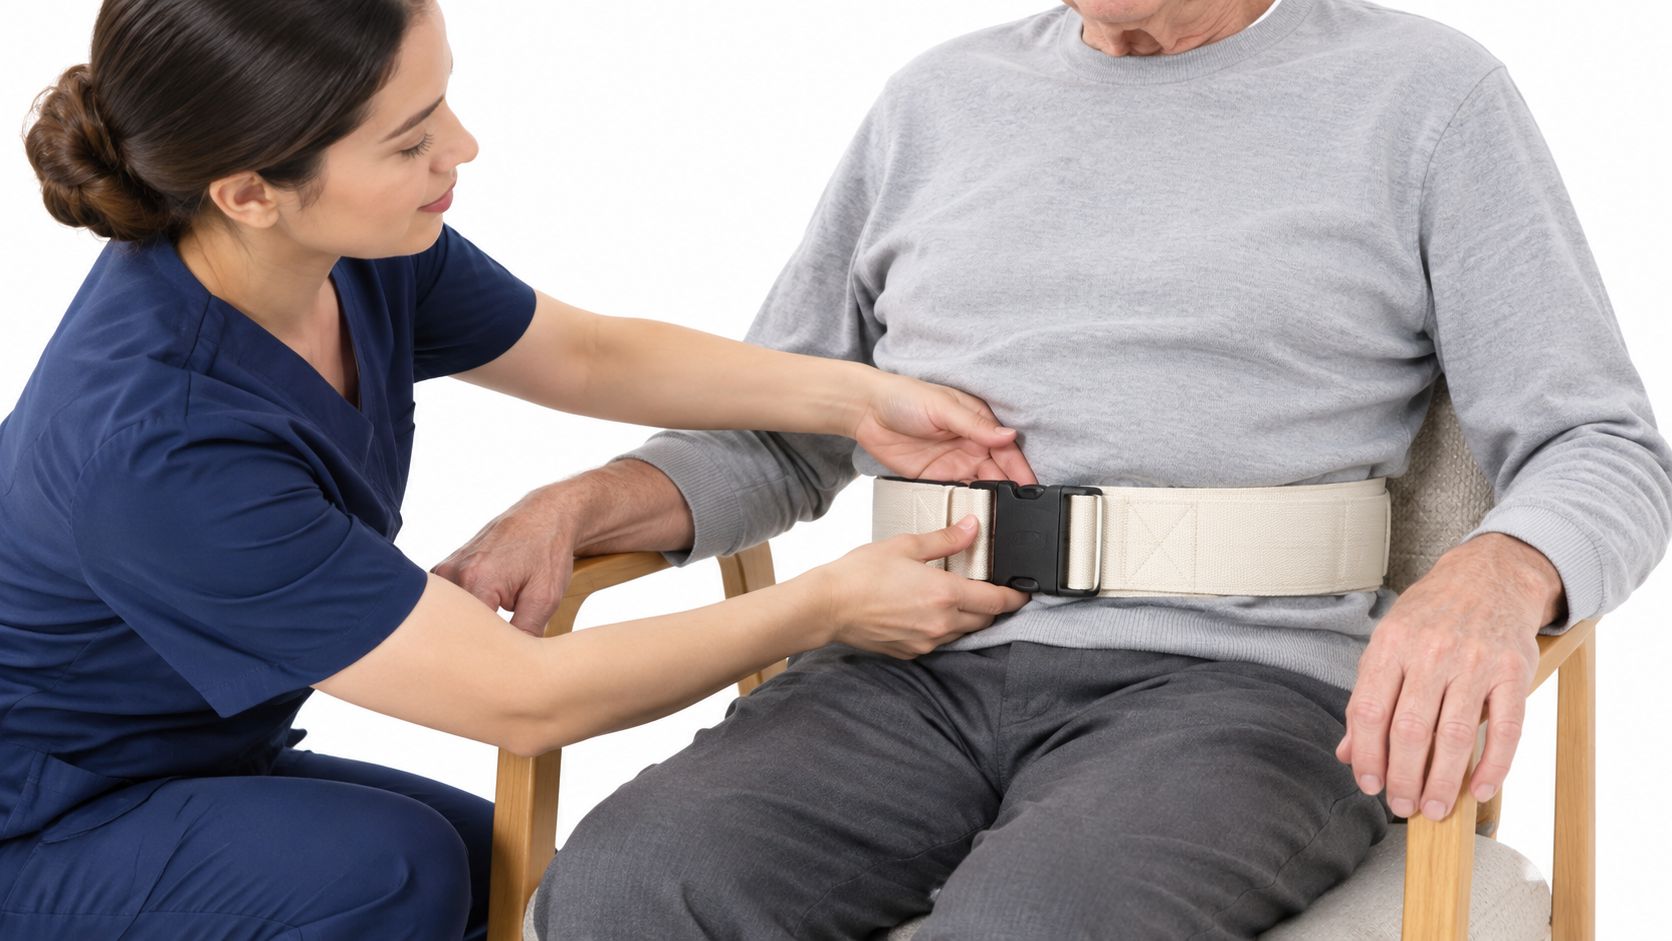
Do not place a belt across an incision, ostomy, vulnerable skin, or an area that makes breathing uncomfortable. Recent surgery, severe respiratory or cardiac disease, poor circulation, decreased sensation, and fragile skin all deserve professional review before use. Families planning broader accessibility changes can also consult this resource on renovations for aging in place, since a safer transfer often depends on the room as well as the device.
For a practical home-care refresher, review essential tips for caregivers during safe transfers before practicing with a family member.
Caregiver Techniques for Sit-to-Stand and Pivots
The same belt can support several movements, but the caregiver's position changes with each task. The consistent principle is coordination. Explain the movement, position the destination, and let the patient contribute before you begin.
Sit-to-stand
Place the wheelchair or chair close to the bed and lock the brakes. Have the patient bring their feet beneath their knees and place their hands on the armrests or thighs. Ask them to lean forward, then use a clear count so both of you begin together.
Stand close with a stable stance and bent knees. Hold the belt to guide the trunk forward and upward, but don't pull the person off the seat. Their legs should provide the main force.
Pivot transfer
Once standing, keep the destination close. Guide the patient in small steps toward the chair while maintaining contact through the belt. Move your feet with the patient and avoid twisting your torso. When the patient feels the chair behind their legs, guide a controlled descent rather than allowing them to drop.
Walking assistance
For ambulation, stand slightly behind and to the weaker side when appropriate. Use the belt to steady the trunk as the person walks at a manageable pace. Stay alert for a sudden knee buckle, loss of balance, or fatigue, and stop before the person becomes unsafe.
| Technique | Main caregiver role | What the patient must do |
|---|---|---|
| Sit-to-stand | Guide forward and upward movement | Push through the legs and follow cues |
| Pivot | Control direction and descent | Take small steps and turn with the caregiver |
| Walking | Steady the trunk and respond to imbalance | Maintain supported steps and communicate fatigue |
Good body mechanics protect the caregiver, but they don't replace assessment. Resources on how to prevent workplace back injuries reinforce the value of avoiding twisting and keeping movement controlled. Families can also compare related options in this guide to a sit-to-stand assist device when standing assistance is the main challenge.
Common Mistakes and Safety Contraindications
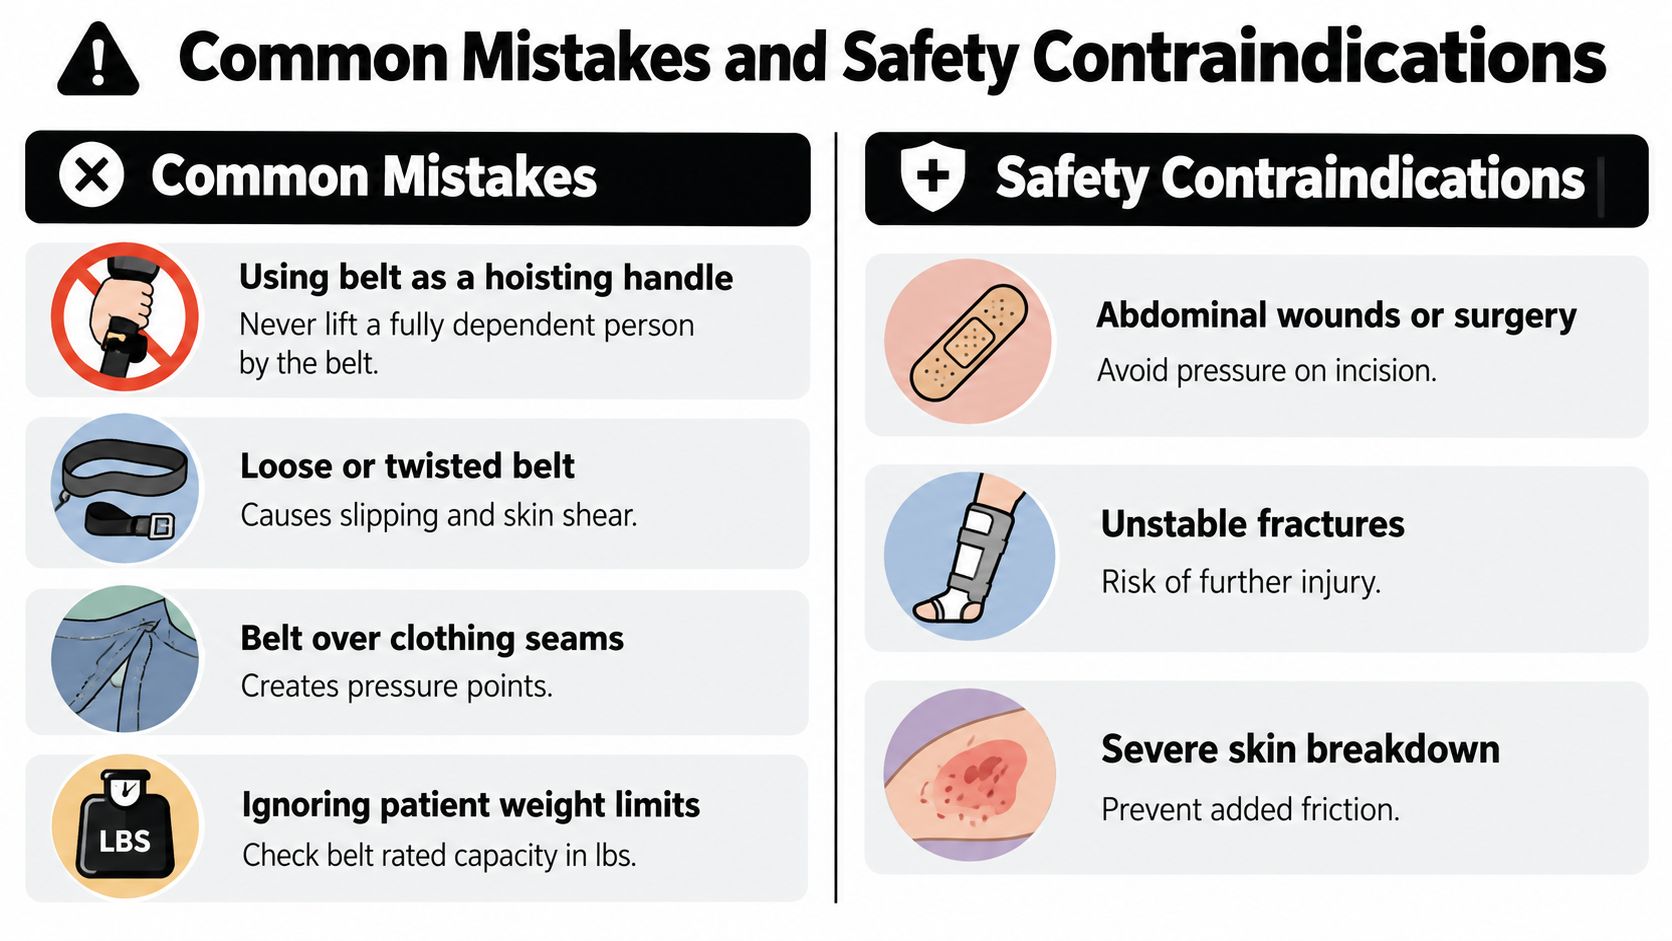
Many transfer injuries begin with a reasonable intention. A caregiver sees a loved one losing balance and pulls harder. The belt then becomes a hoisting handle, even though it was never designed to carry the person's full body weight.
OSHA states that gait belts with handles can help workers support ambulatory patients while walking, but they aren't designed to lift patients and should be used only when the patient can bear at least some of their own weight (OSHA guidance).
Errors that change the risk
- Lifting by the belt: If the person can't rise with their own legs, don't hoist them. Use a mechanical lift or obtain a professional assessment.
- Allowing belt migration: A loose belt may ride toward the chest or armpits, reducing control and creating pressure.
- Ignoring cooperation: A combative, unpredictable, or cognitively impaired person may move suddenly or resist the transfer.
- Pressing on vulnerable areas: Colostomies, ileostomies, abdominal or chest wounds, recent abdominal, chest, or back surgery, and severe respiratory or cardiac disease may make belt pressure unsafe.
- Continuing despite skin concerns: Fragile skin, poor circulation, reduced sensation, or skin breakdown increases the risk of pressure injury.
A transfer belt is appropriate only when the person can participate in the movement and the caregiver can control the environment.
A person at high risk of falling, unable to follow instructions, non-weight-bearing, highly unstable, or unpredictable may require a mechanical lift, transfer board, or trained assistance. The safest alternative is the one that matches the person's current condition, not the device already available in the room.
Buying Considerations and Equipment Care
Choosing a patient transfer belt involves more than selecting the largest circumference or a strap with the most handles. Consider the person's body shape, skin condition, mobility pattern, and the caregiver's grip. Bariatric users may need a wider, reinforced design, while someone with sensitive skin may need padding that reduces rubbing. A buckle must close securely and lie flat without creating a pressure point.
Check the product's fit range and intended use before purchase. Don't confuse a transfer belt with a positioning belt or a wheelchair restraint. Those products serve different purposes and shouldn't be substituted for one another.
Inspect before every use
Manufacturer instructions require checking the fit, avoiding overtightening, and confirming that two fingers fit between the belt and the patient (manufacturer instructions). Add a visual inspection for fraying, thinning material, damaged stitching, a distorted buckle, or contamination that can't be cleaned.
Clean the belt according to its manufacturer's directions and allow it to dry fully before storage. Keep it in a clean, dry location where the buckle and webbing won't be crushed or tangled. Recheck fit whenever clothing, swelling, body position, or mobility changes.

DME Superstore offers transfer belts and other home-care equipment for caregivers comparing options for standing, walking, and transfers. If a person can't participate in a standing transfer, a transfer board for disabled users may be worth discussing with a clinician, depending on the person's abilities and care plan.
Conclusion - Empowering Safe Transfers
A patient transfer belt can change the feel of a difficult transfer. Instead of grabbing an arm or pulling at clothing, the caregiver gains a stable point of contact around the person's trunk. That contact supports guidance, balance, and communication, while the patient remains an active participant.
The distinction between guiding and lifting should shape every decision. If the person can lean forward, push through their legs, follow instructions, and maintain some weight-bearing ability, a belt may support a sit-to-stand, pivot, or assisted walk. If the person is dependent, unpredictable, unable to cooperate, or medically unable to tolerate pressure, a belt isn't enough.
A safer decision process
Start by asking three questions:
- Can the person participate? They should understand the plan and respond to simple cues.
- Can the person bear some weight? Their legs should contribute to standing and movement.
- Can the belt sit safely? It must avoid wounds, ostomies, fragile skin, painful areas, and conditions that make trunk pressure unsafe.
If the answer to any question is no or uncertain, pause. Ask a physical or occupational therapist, nurse, or other qualified clinician to assess the transfer and recommend equipment. A mechanical lift, transfer board, or another device may provide safer support than trying to make a belt do a job it wasn't designed to do.
Correct fit matters just as much as correct technique. Keep the belt flat, check the two-finger clearance, watch the patient's breathing and skin, and stop when pain, numbness, swelling, or distress appears. Prepare the room before movement begins, lock wheelchair brakes, keep the destination close, and pivot with your feet rather than twisting your back.
Remember: The belt gives you control, but the patient's ability, cooperation, and medical condition determine whether the transfer is appropriate.
Safe transfers protect more than the caregiver's back. They preserve the patient's dignity by allowing them to use the strength they still have, rather than treating them as a passive load. With the right assessment, a properly fitted belt, and a technique built around guiding instead of lifting, home caregivers can make routine movement calmer and more predictable.
DME Superstore offers patient transfer belts, gait belts, transfer aids, and other durable medical equipment for safer mobility at home. Visit DME Superstore to compare transfer-support options and choose equipment that fits the person's mobility needs and care plan.

