



Your scooter loses power halfway up a ramp. The battery indicator looked fine before you left, so you're wondering whether you need a battery, a motor, or something you can't even name. Before ordering anything, park safely and stop riding until you understand why it lost power.
Choosing mobility scooter parts starts with understanding how the machine works as a whole. A battery supplies energy, electronics control its delivery, and mechanical parts turn that energy into movement. The safest approach is to identify the symptom, rule out a stop-use condition, and match any replacement to the scooter's documented specifications.
Mobility Scooter Parts at a Glance
A loss of power doesn't identify the failed part by itself. The battery may need attention, but a damaged connector, control fault, or dragging brake can also affect how the scooter behaves. Use the following descriptions to identify components, not to diagnose a failure from appearance alone.
Mobility scooter parts: function, identification and early wear signs
| Part | What It Does | How to Identify It | Early Wear Sign |
|---|---|---|---|
| Battery pack | Stores the energy that drives the motor and lights | Label shows volts and amp-hours; lead-acid or lithium; housed in the battery bay | Shorter range, slower charging, swelling or heat |
| Charger | Converts mains power into a battery-specific charge | Label shows output voltage and current; connector shape is model-specific | Charge light stays on, unusually warm plug or housing, no charge |
| Controller | Regulates motor speed and braking from throttle input | Sealed module under the seat or in the base; fault codes may appear on the display | Jerky acceleration, fault codes, no throttle response |
| Motor | Turns the drive wheel or wheels | Hub or axle unit with a rating label | Grinding, burning smell, weak climbing |
| Electromagnetic brake | Holds the scooter when stopped and releases under power | At the motor housing, with a release lever or switch | Rolling on slopes, failure to hold when parked |
| Throttle or tiller | Sends speed commands to the controller | Tiller head or control module on the handlebar | Dead spots, sticking, sudden speed surges |
| Tires and wheels | Carry load, provide grip and affect rolling resistance | Sidewall size and load rating; solid, pneumatic or foam-filled construction | Low pressure, cracks, uneven wear, wobble |
| Seat and armrests | Support posture and carry the swivel mechanism | Seat-base mounting pattern and swivel latch | Cracked cushioning, sagging base, loose swivel |
| Wiring and connectors | Carry current and control signals | Multi-pin plugs and harnesses with identification or polarity markings | Discoloration, melted housings, intermittent power |
Read symptoms as clues
Find the component that resembles yours, then compare its label and location with the owner's manual. Don't remove sealed covers just to identify an internal part.
International standards distinguish between electrical controls, structural strength, and other safety requirements. The ISO standards history for powered-wheelchair and scooter controls helps explain why a component's physical appearance is only part of its specification.
Starting point: A symptom tells you where to investigate. It doesn't tell you what to buy.
A part rarely works in isolation. When a technician finds damage, the next question should be what caused it and whether connected components also need inspection.
Matching Parts by Model, Voltage and Connector
A replacement battery can slide into the compartment and still be unsafe to use. The battery, charger, wiring, and controller work together like connected links in one system. Physical fit is necessary, but it isn't proof of compatibility. Before ordering, check the scooter's model, electrical specifications, connectors, and the loads each part must handle.
Start with the data plate under the seat or on the frame. Record the complete model and serial number, since parts may change during production. Photograph the original component label before removing it. If the scooter has a fault that makes it unsafe to operate, stop using it and have the problem checked before ordering a part.
Compatibility checks before ordering a replacement part
| Specification | Where to Find It | Why It Matters | Mismatch Risk |
|---|---|---|---|
| Model and serial number | Data plate under the seat or on the frame | Parts can change during production | Wrong controller or brake fit |
| Nominal system voltage | Battery and controller labels | Electronics require the specified operating voltage | Overheating and module failure |
| Battery chemistry | Battery label or owner's manual | Lead-acid and lithium need different charging profiles | Undercharging or cell damage |
| Connector type and polarity | Plug shape, pin count, markings and wiring diagram | Matching shells don't establish matching electrical connections | Damaged modules or no power |
| Controller current rating | Controller label or manual | A higher rating can change braking and heat | Altered braking and thermal stress |
| Maximum battery mass and dimensions | Owner's manual and battery-bay measurements | Weight and fit affect mounting and stability | Loose mounting and poor fit |
| Tire size and load rating | Tire sidewall and hub markings | Diameter and load capacity affect safe operation | Wobble and reduced safety margin |
Record the complete specification
Voltage is the system's electrical operating level. Amp-hours describe battery capacity, not whether a battery with a different voltage will work. Copy both values exactly, along with the chemistry, dimensions, terminal arrangement, and original part number. The plug shape alone cannot confirm that the pins have the right polarity or carry power safely.
Measure the battery bay to check clearance, then look up the permitted battery mass in the manufacturer's documentation. A compartment measurement cannot tell you how much weight the scooter can safely carry. For tires and other load-bearing parts, match the size and load rating rather than relying on appearance.
The old battery also needs a recycling route that accepts its chemistry. Ask the seller to confirm where it can be taken, and follow the recycling guidance later in this article.
Before using a mobility scooter battery buying guide to compare options, prepare a specification sheet from the scooter and component labels. Ask the seller to verify that the replacement matches the model, voltage, connector and polarity, and required load rating. A part should work with the rest of the system, not merely fit in its space.
Lead-Acid and Lithium Battery Choices Compared
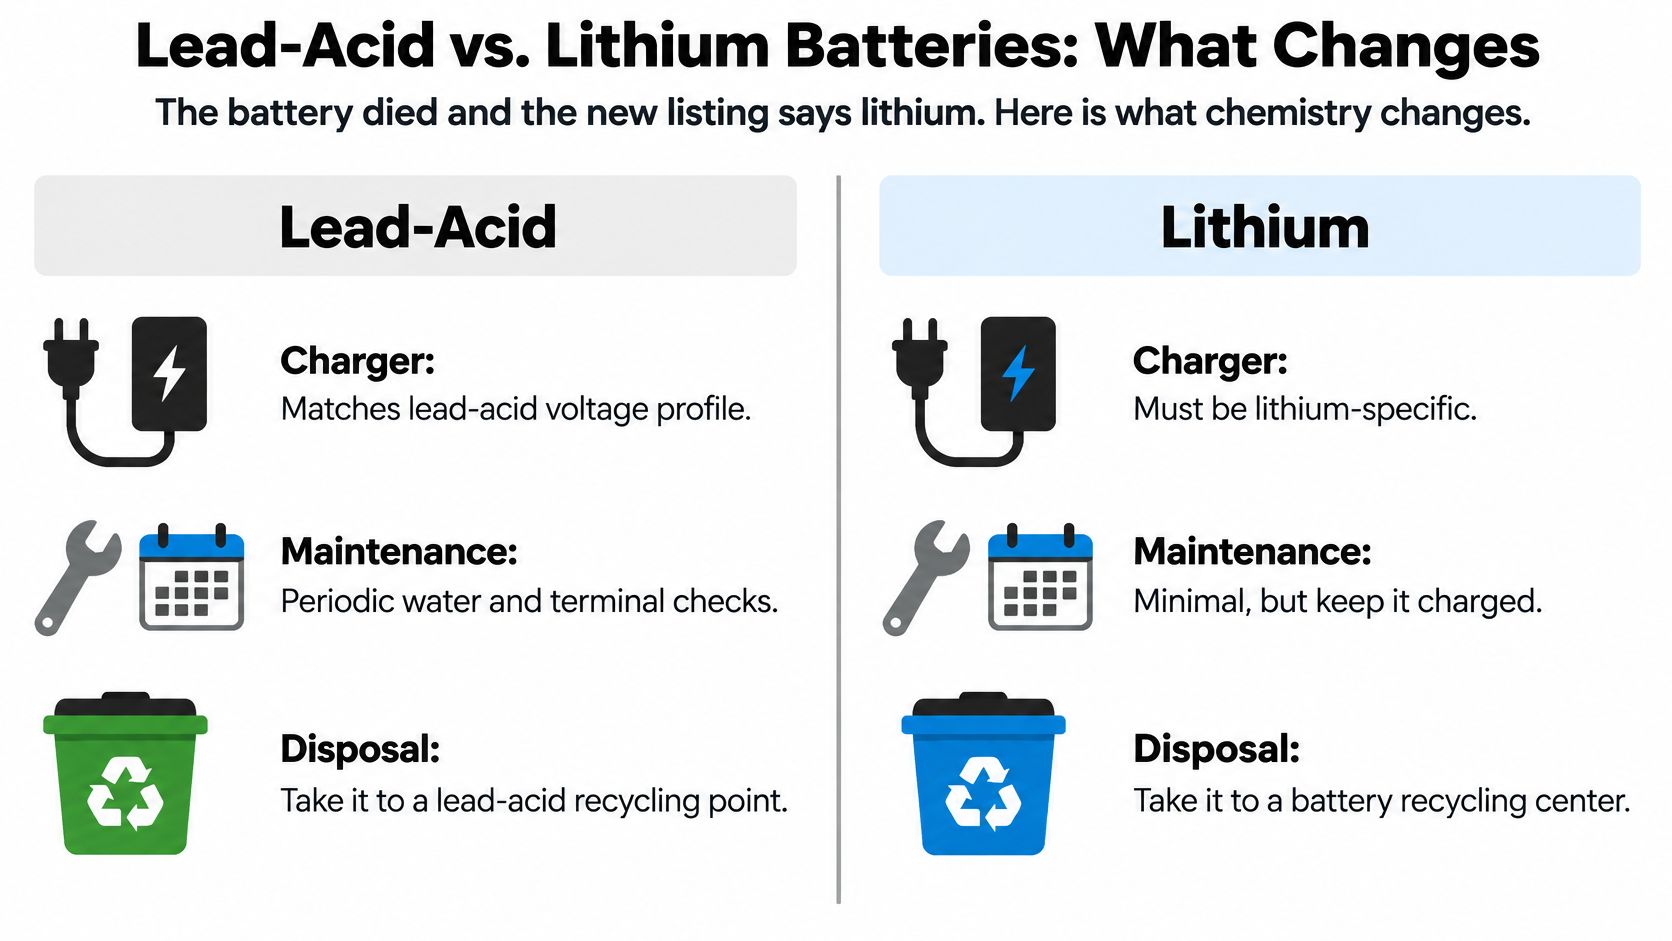
Your original battery has stopped meeting your needs, but a replacement listing advertises lithium while the old pack says lead-acid. That isn't a simple choice between an older and newer product. Changing chemistry can change the charger, protection electronics, mounting requirements, and maintenance routine.
Lead-acid replacements generally use sealed batteries assembled into the scooter's specified configuration. Lithium packs depend on compatible battery-management electronics and protection systems. Neither chemistry should be treated as a universal replacement for the other.
This comparison highlights what to check before choosing a pack.
Maintenance depends on battery construction
With lead-acid batteries, distinguish sealed construction from a serviceable battery. Sealed batteries don't need water added, and you shouldn't open them. Only perform water-level checks or distilled-water top-ups when the battery manufacturer specifically requires them.
Lithium packs may involve less routine maintenance, but that doesn't make their protective circuitry optional. Don't bypass the battery-management system or assume a pack is suitable because its connector looks familiar.
Weight matters when you lift a removable battery into the bay. Compare the actual approved packs rather than assuming a chemistry label tells you the lifting weight, usable range, or suitability for your scooter.
- For an existing lead-acid system: Prefer the documented replacement configuration unless the manufacturer approves a conversion.
- For an existing lithium system: Match the approved pack, charger, protection system, and mounting arrangement.
- For either chemistry: Arrange collection through a battery recycler that accepts that battery type. Don't treat a spent pack as an ordinary accessory to discard.
Air travel needs a separate check
A battery installed on the scooter and a spare carried separately aren't necessarily handled the same way. Describe the exact arrangement to the airline, including whether the battery must be removed.
FAA passenger battery guidance specifies a 300 Wh limit for lithium-ion mobility-aid batteries, permits one spare up to 300 Wh or two spares up to 160 Wh each in the cabin, and prohibits spare batteries in checked baggage. It also requires notifying the airline and protecting batteries against short circuits and damage.
To understand the label, watt-hours equal volts multiplied by amp-hours, as reflected in that FAA guidance. If the label is unclear, obtain the manufacturer's documentation rather than estimating from the scooter's advertised range.
A battery advertised as airline approved still needs to meet the airline's requirements for your particular journey.
Keep the battery label, handling instructions, and airline confirmation with your travel documents. Ask about terminal protection and how the scooter will be loaded, especially if you're carrying an additional pack.
Never switch battery chemistry without the manufacturer's written approval and the charger specified for the approved conversion. A new charger alone doesn't establish that the rest of the scooter is compatible.
Testing and Caring for Your Scooter Battery
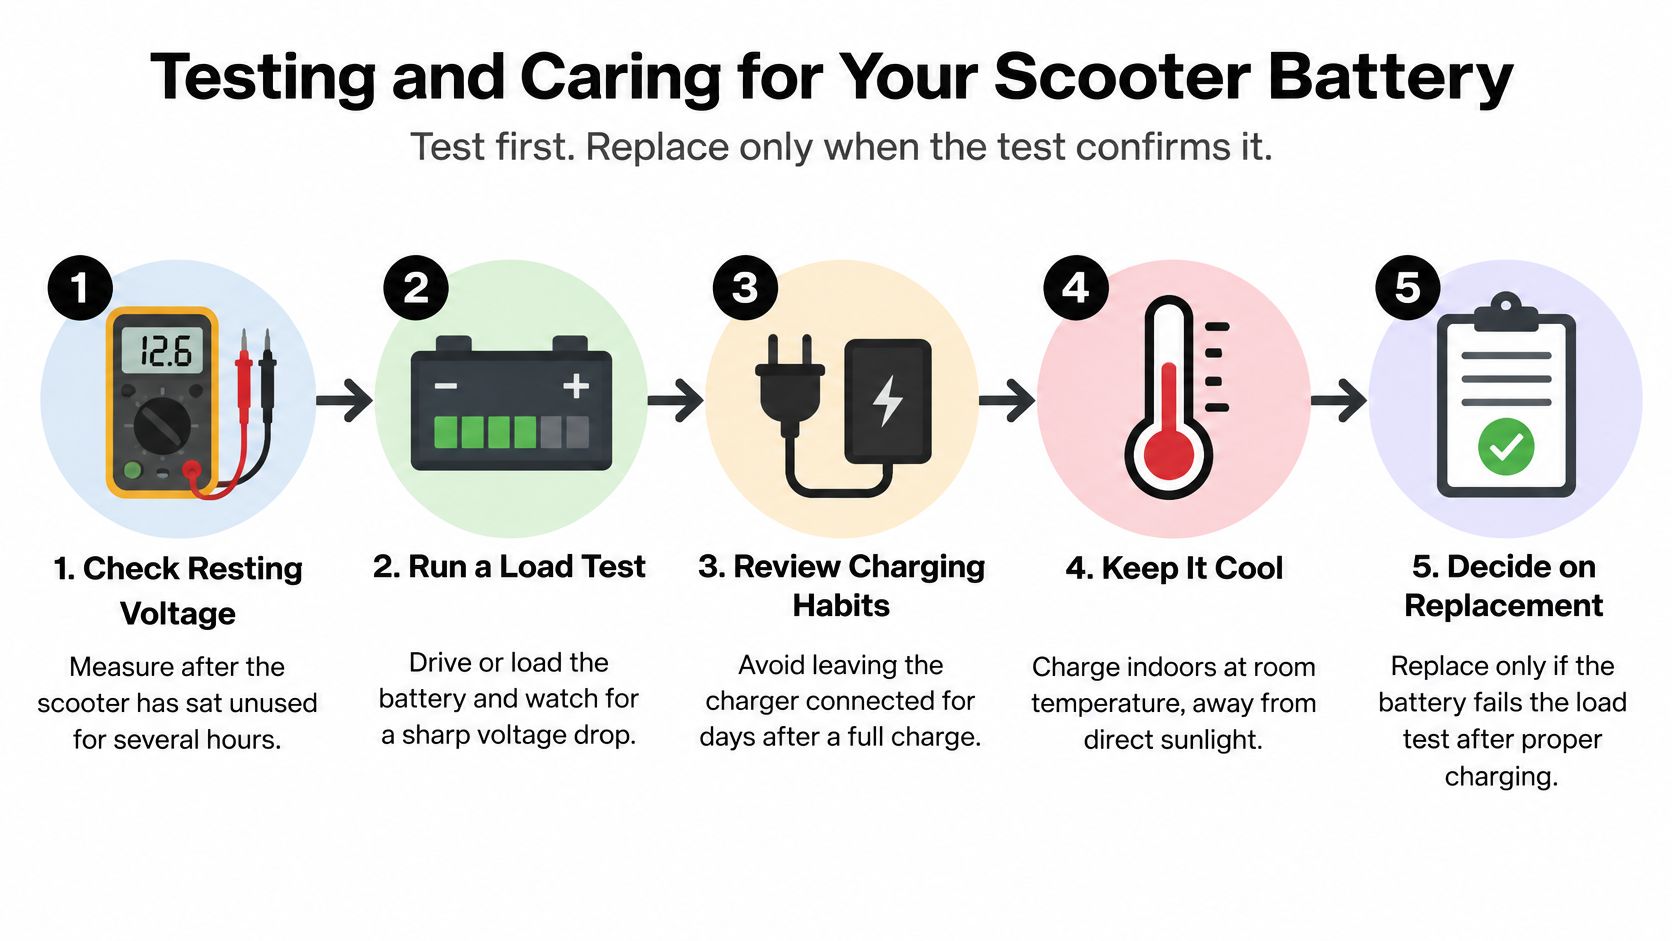
A scooter that once travelled farther may now stop early, but reduced range alone doesn't prove the battery needs replacing. The battery, charger, terminals, and other connected parts all affect performance. Check the system before ordering a part, and don't ride if the scooter has unexplained shutdowns or another safety concern.
Begin with what you can inspect safely. Never open a sealed battery pack.
Follow a controlled testing sequence
- Charge with the approved charger. Follow the manufacturer's instructions and check that the charger shows its expected completion signal.
- Allow the specified rest period. Battery voltage can change after charging, so use the battery maker's recommended wait before checking a resting-voltage reading.
- Measure at approved access points only. If reaching the terminals means dismantling the pack, or you're unsure how to use a multimeter safely, ask a qualified technician.
- Record a controlled range or load test. Test only a scooter cleared for use. Choose a safe, repeatable route, record the distance, and stop before you risk being stranded.
- Inspect accessible terminals. Look for corrosion, loose connections, or damaged insulation. Keep tools from bridging the terminals.
- Watch for warning signs. Stop charging and using the battery if it becomes unusually hot, swells, leaks, changes colour, or develops an unusual odour.
Battery test readings and replacement signs
| Test | How to Run It | Healthy Reading | Replace or Service When |
|---|---|---|---|
| Resting voltage of a lead-acid block | Use a multimeter at approved terminals after the specified rest period | Within the manufacturer's fully charged resting-voltage range | It stays below that range after correct charging; request a load test |
| Lithium pack charge state | Check the display, app, or manufacturer's meter | Reaches the manufacturer's full-charge figure | It shuts off early or never reaches full |
| Load and range test | Start with a full charge, travel a measured route, and record distance | Consistent with a comparable earlier baseline | Range drops sharply or power becomes unstable |
| Terminal condition | Inspect visually and check tightness only as approved | Clean and secure, with no white powder | White or green corrosion appears, or terminals are loose |
| Heat during charging | Observe the battery housing without opening it | No abnormal heating or other warning signs | Unusual heat, odour, swelling, leakage, or discolouration |
A resting-voltage reading is one clue, not a verdict. Ask a technician to compare it with battery performance under load before replacing the pack. The charger and battery must also match the scooter's specified voltage and connector, so a weak reading alone is not enough to choose a replacement.
For a visual introduction to battery testing, watch this demonstration while following your scooter's service instructions.
Build a safe charging routine
Make charging predictable and supervised: after using the scooter, recharge in an attended area, then disconnect the charger when charging is complete. Do not leave a battery charging while you sleep or when nobody is present. The Oklahoma mobility-device safety guidance recommends recharging after use and at least weekly during infrequent use. It also advises avoiding discharge below 30%, checking terminals for white powder, charging near an open window, and arranging annual professional service. The Massachusetts lithium-battery fire-safety guidance warns against overnight or unattended charging and recommends using the manufacturer's charging cord.
If your battery or scooter manufacturer specifies a different schedule, follow its instructions and confirm any uncertainty with the manufacturer or a qualified technician. Keep the charging area clear of combustible materials. Store and charge the battery at room temperature, away from direct sunlight, hot cars, and freezing conditions. Stop using it if you notice unusual heat, odour, leakage, discolouration, a change in shape, or unusual noises. The guide to extending mobility scooter battery life offers further care advice to compare with the instructions for your particular battery.
Motors, Brakes, Tires and Wheels Explained
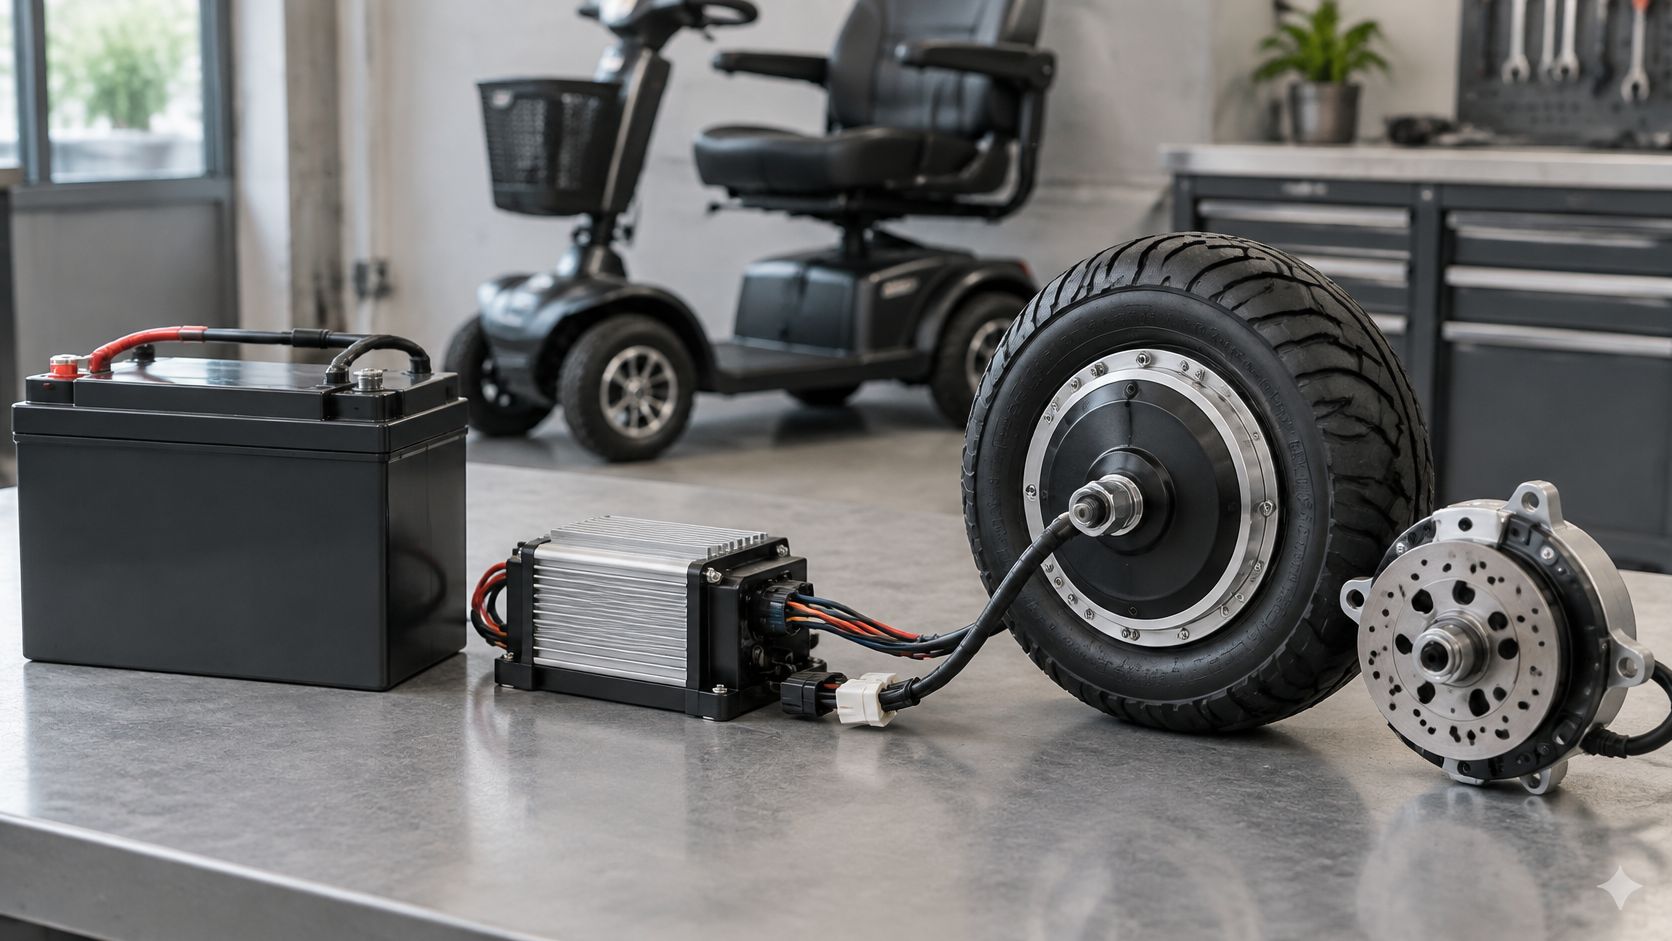
Follow the drive chain: the battery supplies the controller, the controller operates the motor, and the motor turns the drive wheel or axle. The electromagnetic brake holds the drive when the scooter is stopped and releases for powered movement. A problem anywhere along that chain can change how the scooter climbs, stops, or uses energy.
These components illustrate why a weak-climbing scooter needs a system check rather than an immediate motor order.
Separate motor symptoms from supply problems
Grinding, a burning smell, or weak climbing deserves inspection. Before condemning the motor, have the battery supply, controller connections, and brake operation checked. Don't continue riding to see whether a burning smell disappears.
A brake that drags can make the scooter work harder. A brake that fails to hold is a stop-use problem, not an invitation to compensate with the throttle or park only on flatter ground.
The ISO wheelchair and scooter performance-testing framework supports evaluating batteries and chargers, energy consumption and theoretical range, and dynamic stability through appropriate standardized tests. Real-world range also depends on payload, tire pressure, terrain, temperature, speed, stops, and battery age.
That's why an advertised battery range isn't a promise for every journey. Keep your own comparison conditions consistent when assessing a replacement.
Choose tires for the approved application
Tire construction changes the maintenance task and ride characteristics. Use the scooter maker's approved options rather than selecting solely by appearance.
| Tire Type | Practical Use | Trade-Off to Consider |
|---|---|---|
| Solid rubber | Avoiding air-pressure maintenance and air-loss punctures | Firmer ride; confirm suitability for the intended surface |
| Pneumatic | Air cushioning for outdoor use | Needs pressure checks and can puncture |
| Foam-filled | Avoiding routine air-loss problems | Weight and firmness need consideration |
| Puncture-resistant pneumatic | Routes where puncture protection is useful | Still needs pressure checks; compare the specific construction |
The comparison of pneumatic and solid scooter tires can help you discuss those trade-offs with a supplier. Don't assume a solid tire will have the same grip or handling as the original pneumatic tire.
For replacement, match diameter, load rating, tread, axle fit, and the approved inflation specification. Use the scooter manufacturer's operating-pressure instructions rather than assuming a sidewall maximum is the correct setting.
Inspect for cracks, uneven wear, wobble, and movement at the hub. If the wheel feels loose, stop using the scooter and arrange inspection instead of treating it as a tire-only problem.
Controllers, Throttles, Chargers and Wiring
You press the throttle and nothing happens. It's tempting to blame the controller, but the controller can only respond correctly when it receives a valid command and stable electrical power. A sticking throttle, damaged plug, or wiring fault can make the problem look like a failed control module.
The controller manages motor operation from the throttle signal, including acceleration and braking behavior. Identify it through its part label, connector arrangement, and the service manual's fault-code information, not just the shape of its housing.
Check the command before replacing the controller
The throttle is a control input, not merely a mechanical lever. With the scooter secured and switched off, check whether it moves freely and returns to its neutral position as the owner's manual describes. Don't power up a scooter with a sticking throttle to test whether it will surge.
- Record the fault indication: Write down the complete displayed code or beep pattern and the circumstances in which it occurs.
- Inspect accessible connections: Look for displaced plugs, damaged insulation, corrosion, or signs of overheating.
- Preserve identification: Photograph the controller label and connector positions before a technician disconnects anything.
ISO 7176-14:2022 covers power and control systems for powered wheelchairs and scooters with maximum speeds up to 15 km/h, including normal operation and selected abuse or failure conditions. Its scope includes control-operation forces, reinforcing why throttles, switches, isolation devices, and controller interfaces are safety-critical components.
A technician should use the model's service procedure to separate a throttle fault from a controller fault. Replacing both without diagnosis can leave the original wiring problem unresolved.
Treat charging and wiring as controlled systems
A charger needs the approved output and battery-specific charging profile. A lost indicator, failure to finish charging, or abnormal heating calls for inspection of the charger, cord, outlet, and battery connection. An indicator alone doesn't establish which component has failed.
The scooter battery charger guide offers a useful starting point for identifying the correct replacement. Don't select a universal charger just because its plug fits.
Upgrade warning: More controller current, a universal throttle, or a different connector isn't automatically an improvement.
Those changes can alter acceleration, braking, thermal loading, electromagnetic compatibility, and fault protection. Damaged harness sections should be repaired or replaced using documented methods, not bypassed with improvised connections.
Keep the original part number, electrical rating, wiring pinout, installation date, and functional-check record. A pinout is the diagram showing what each connector contact does, information a technician needs to avoid connecting the wrong circuits.
Diagnosing Symptoms and Stopping Safely
A scooter that loses power on a slope, wobbles, or rolls when stopped may have a problem that involves more than one part. The battery, motor, brakes, tires, wheels, wiring, and controller work as one electrical and mechanical system. Before ordering anything, decide whether it is safe to use, then check the likely causes and match any replacement to the scooter's model and specifications.
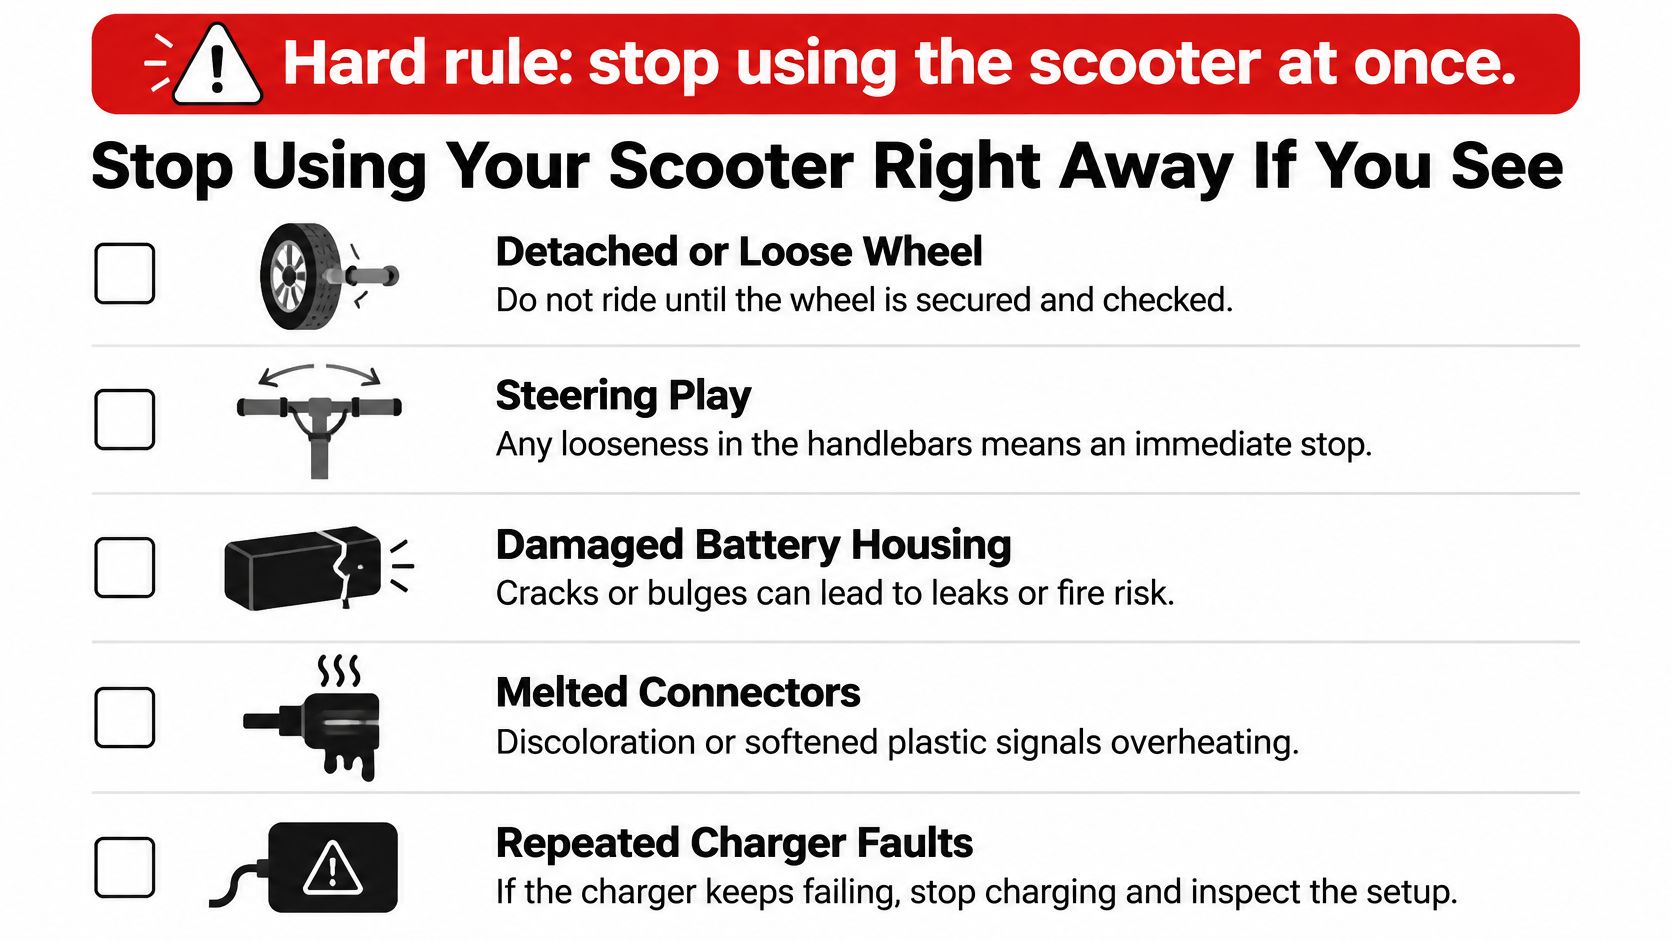
Stop using the scooter immediately if a wheel is detached or loose, the steering has play, the battery housing is damaged, a connector is melted, the charger repeatedly faults, or power loss has no clear cause. Don't drive it to demonstrate the problem. Get help and move the scooter only as the manufacturer's instructions allow.
Wheel attachment failures have been the subject of safety recalls. Check the U.S. Consumer Product Safety Commission's scooter recall page using the complete model and serial number. A recall notice may provide a specific remedy, so don't assume that buying a replacement part addresses the hazard.
Preserve evidence before ordering
Photograph the failed part, its fasteners, nearby damage, and the scooter's data plate. Keep the original part until the manufacturer, repairer, or recall administrator says whether it is needed. These details help identify a compatible replacement and show whether the failure may extend to the mount, wiring, or another connected part.
| Symptom | Likely Part | First Check | Also Check |
|---|---|---|---|
| Scooter will not power on | Battery or main fuse | Battery charge state and connectors | Key switch, fuse and wiring |
| Slow or no response to throttle | Throttle or controller | Throttle return and any fault code | Controller connector pins |
| Will not charge | Charger or battery | Charger indicator, cord and outlet | Battery voltage and connector polarity |
| Loses power on hills | Battery or motor | Professional battery-voltage check under load | Brake drag and tire pressure |
| Rolls on slopes when stopped | Electromagnetic brake | Brake engagement and release | Brake lever, wiring and motor housing |
| Pulls to one side | Tire or motor | Tire pressure and wear | Wheel bearing and brake drag |
| Wobble or steering play | Wheel, axle or fastener | Wheel attachment and specified fastener security | Tire damage and front suspension |
Use the table to guide an inspection, not to declare a part faulty. For example, a scooter that will not power on needs its charge state and accessible connectors checked before anyone concludes that the fuse has failed. Never bypass a fuse or install one with a different rating.
Re-test the whole scooter after repair
A scooter that rolls while stopped points first to brake engagement, though another fault may also be involved. A replacement wheel will not fix a damaged axle, mounting point, or steering assembly. Tighten fasteners only by the model's specified procedure and torque, not by guesswork.
After safety-critical work, a qualified technician should check forward and reverse operation, brake release and holding, emergency stopping, the charging interlock, and relevant fault responses. Record the results before returning the scooter to use. The guide to using a mobility scooter can help refresh operating knowledge after the machine has been cleared for service. Knowing the controls does not resolve an underlying defect.
If the cause remains unclear, seek professional inspection instead of buying parts one by one. Any replacement must match the scooter's model and, where applicable, its voltage, connector, and load rating. A visibly worn part can be only one sign of a deeper electrical or structural problem.
Choosing OEM or Aftermarket Parts and Ordering Safely
For controllers, chargers, battery packs, and brake assemblies, choose OEM or manufacturer-approved parts as the default. OEM means original equipment manufacturer. An aftermarket part comes from another supplier, and its suitability depends on the actual specifications and approval, not the word replacement in its listing.
The CPSC's micromobility safety guidance advises using replacement or secondary battery packs tested and approved for safe operation with the device and confirmed suitable by its manufacturer. A low price or familiar connector doesn't establish that approval.
Compare documentation as carefully as the part
An OEM label can make identification easier, but still verify the exact part number and production compatibility. For an aftermarket alternative, ask what documentation establishes fit, electrical matching, load capacity, and intended use.
| Decision Point | What to Confirm |
|---|---|
| Fit and specification | Exact dimensions, mounting arrangement and applicable ratings |
| Electrical matching | Documented compatibility with the scooter's existing system |
| Installation information | Wiring details, required settings and service instructions |
| Warranty | Who provides coverage and what exclusions apply |
| Price | Complete cost, including necessary approved accessories |
| Discontinued models | Written evidence that the substitute is suitable |
| Returns | Whether an incorrectly matched or installed electrical part can be returned |
An aftermarket tire, seat cushion, or armrest can be a reasonable option for an older scooter when its dimensions, mounting, and relevant ratings match. Those parts still deserve scrutiny: a cushion must fit securely, and an armrest or seat mount must not compromise support or transfers.
Don't assume all aftermarket parts are poorly documented or all OEM parts remain available. Choose on the evidence the seller can provide.
Make the order traceable
- Prepare identification: Record the scooter model, serial number, and original part number.
- Attach the specification sheet: Include the electrical and mechanical details established during matching.
- Request approval evidence: Ask how the manufacturer confirms suitability, especially for a battery or charger.
- Confirm purchase terms: Read the warranty, installation conditions, and return exclusions before paying.
- Keep written confirmation: Save the seller's compatibility response with your photographs and service records.
When a seller can't confirm a safety-critical specification, pause the purchase. The useful question isn't whether the part fits, but whether it preserves the scooter's intended operation.
Visit DME Superstore to explore mobility scooter replacement parts, accessories, and educational buying guides. Bring your model, serial number, original part number, and specification sheet when asking about an option, and request written compatibility confirmation before ordering.
