



Your car clears the raised garage floor without scraping, so the entrance looks solved. Then you try to bring a scooter through the same opening, or a family member using a rollator tries to walk beside the parked car, and the slope that worked for tires suddenly feels steep, narrow, and unstable. That's the moment most garage ramp decisions go wrong, because vehicle access and people access aren't the same job.
Why Garage Ramp Needs Serve Two Jobs
A homeowner parks inside every evening, bumps over the threshold lip, and thinks a short, steep wedge will smooth the transition. A week later, a caregiver needs to bring a powerchair from the driveway into the garage. The front casters hit the abrupt edge, the chair tips slightly sideways on the incline, and there's no flat space to stop and regroup beside the car.
The car never had a problem. Its tires are wide, its weight is distributed across a long wheelbase, and the driver controls it from inside. A person on foot, in a wheelchair, or on a scooter experiences that same surface completely differently. Small front casters catch on lips that car tires roll over. A slope a driver barely notices can exhaust someone pushing a manual wheelchair or make a rollator user fear rolling backward.
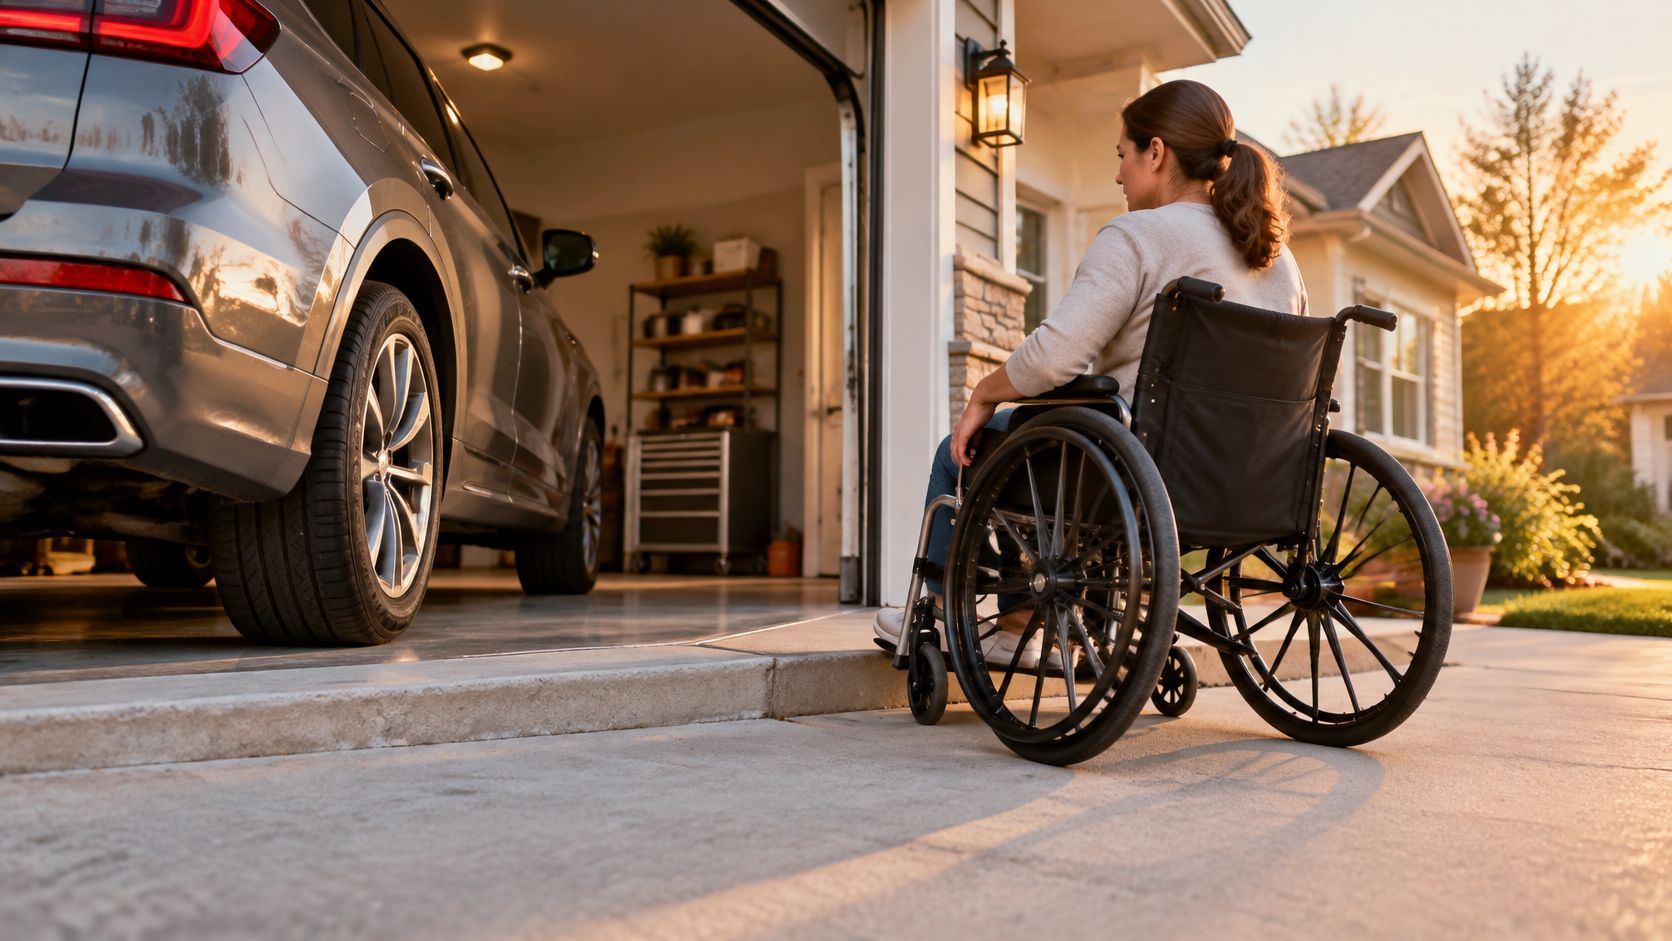
Two Routes Through One Opening
Treat every car ramp for garage use as two design questions. First, can the vehicle cross without scraping, slipping, or leaving the ramp edge. Second, can people move beside or across that route safely, including older adults, wheelchair users, and caregivers pushing equipment. A surface can pass the first test and fail the second completely.
That separation changes what you buy. You may need a vehicle-capable ramp or engineered driveway approach for the car, plus a separate, gentler path for a mobility device. Or one carefully measured solution may serve both, but only if slope, width, traction, and transitions work for the most vulnerable user, not just the heaviest one.
You'll get the most from the guidance ahead if you decide first who or what must cross, measure before browsing products, and treat accessibility benchmarks as references rather than automatic vehicle specifications. Storage and testing matter as much as the purchase itself.
The correct ramp depends on who or what must cross the garage entrance, not on which product looks sturdy enough for tires.
Measure the Garage Entrance Correctly
Don't open a product page until you've measured the entrance. Guessing rise from memory is how people end up with ramps that are too short, too steep, or too narrow, and returns don't fix a fall that happens during the first test.
Start with vertical rise. Measure from the driveway or lower floor surface straight up to the top of the garage threshold, including any lip, weather strip, or raised edge. Then measure available horizontal run, the flat distance you can use before a wall, parked car, storage, or a slope change interferes. Record both in inches so slope math stays simple later.
What to Record Before Buying
Next, capture the details that don't show up in a headline dimension. Note thresholds and floor transitions, doorway clear width for any pedestrian door, and where water pools after rain. Check turning space at the top and bottom, because a scooter or caregiver pushing a chair needs room to align before climbing, not after. Guidance on accessible threshold planning and clear openings can help you think through the doorway side of this profile.
For context on pedestrian geometry, the 1991 ADA Standards established a 1:12 maximum running slope for new construction, meaning each inch of rise requires at least 12 inches of horizontal run, and limited an individual ramp run to 30 inches of rise. That's an accessibility benchmark, not a universal vehicle spec, but it gives your measurements meaning.
Now add the users. Record the lowest-clearance vehicle expected in the garage, since that's the one that scrapes. If a wheelchair, scooter, rollator, or walker will use the route, measure its width, wheelbase, ground clearance, and the combined weight of user, device, and accessories.
Garage Ramp Planning Measurements
| Measure or verify | Why it affects the choice | Record before buying |
|---|---|---|
| Rise and run | Sets slope and ramp length | Both in inches |
| Threshold lip | Abrupt edges destabilize casters | Height and shape |
| Clear width | Determines steering room | Narrowest point |
| Vehicle clearance | Prevents underbody scraping | Lowest vehicle |
| Device load | Capacity must exceed total weight | User plus device |
| Drainage path | Standing water destroys traction | Where water pools |
That site profile lets you rule out unsuitable ramps quickly instead of discovering problems under load.
Choose the Right Garage Ramp Type
Product labels blur together. Words like portable, threshold, and heavy duty describe marketing categories, not whether a ramp fits your entrance. Match the type to the job, then verify dimensions and capacity against your measurements.
A portable threshold ramp suits a scooter, powerchair, walker, or rollator crossing a low entrance lip. For a larger rise, a longer ramp provides a gentler slope where space allows. A vehicle-capable ramp or engineered approach is a different product class entirely, built for tire loads, alignment, and repeated car crossings.
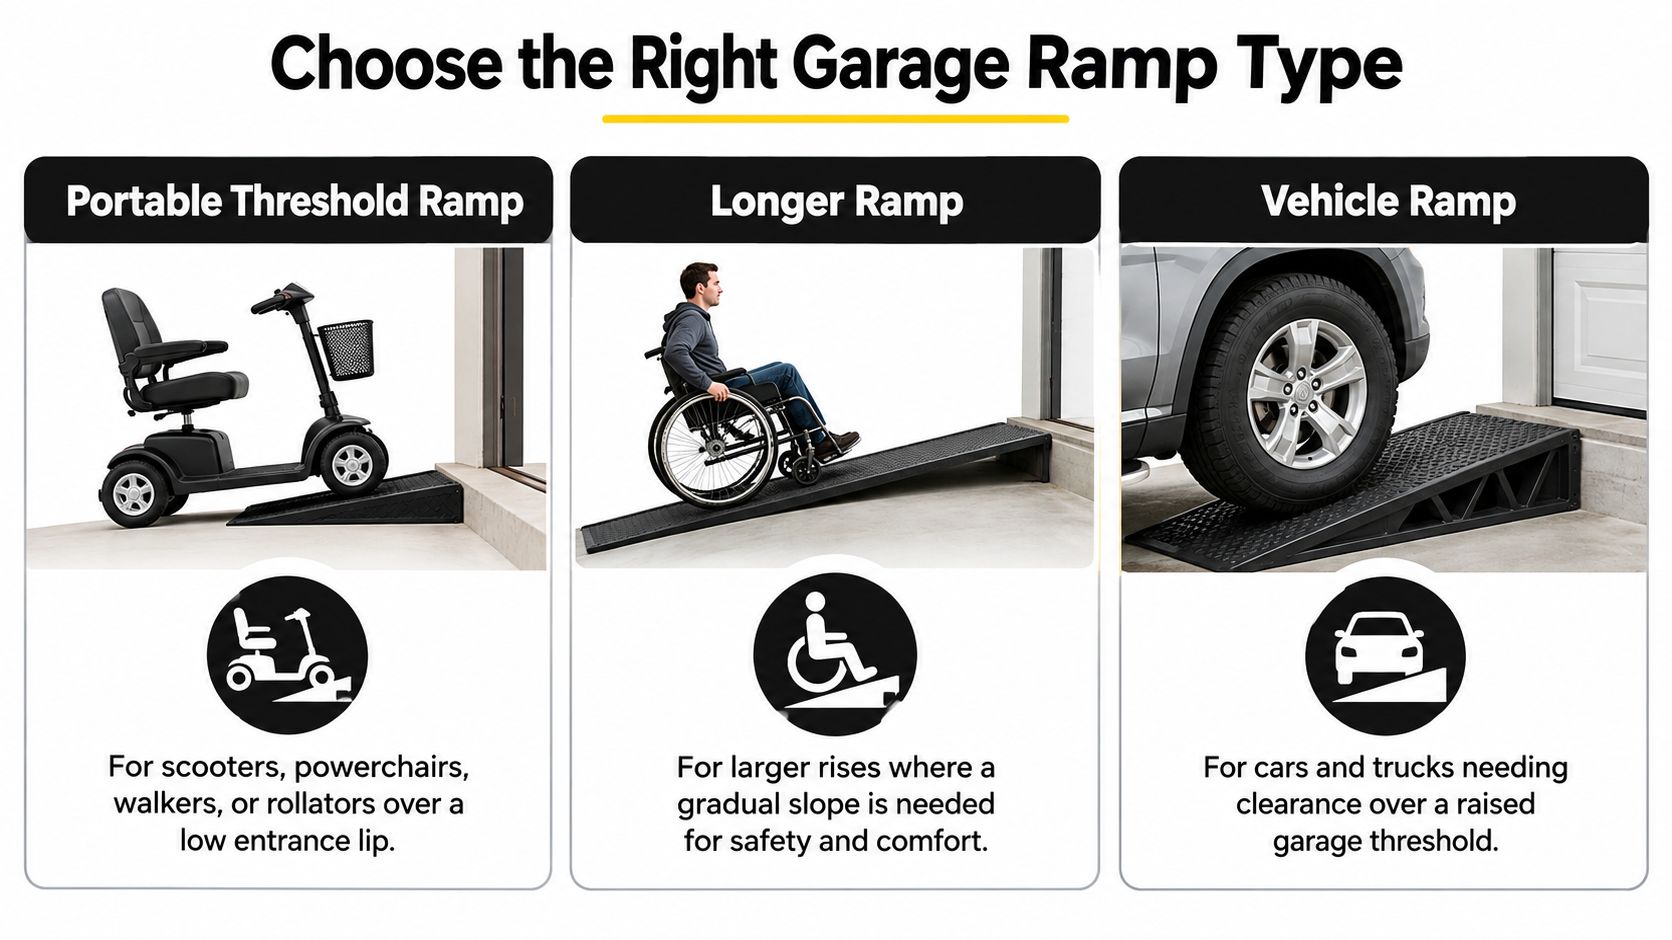
Match the Type to the User
For portable threshold ramps, selection guidance based on the mobility device and user makes clear that dimensions should come from the device rather than the doorway alone, the rated capacity must exceed the combined user, device, and accessory load, and usable width must provide steering clearance. A caregiver helping a bariatric user needs that combined-load check most, because device shipping weight understates the actual load. A broader overview of threshold ramps and mats is useful when comparing low-profile options for interior transitions.
Consider three common situations. A narrow residential threshold with a rollator needs a small, stable wedge with full edge contact, not vehicle strength. A homeowner who only wants to protect a raised garage floor from tire impact needs vehicle capacity and smooth transitions, not pedestrian slope. A household with both needs may need two solutions, and that's not a failure. It's honest design.
- Slope and length: Choose based on measured rise, not available storage space.
- Surface traction: Textured finishes matter more than the word portable.
- Storage: A ramp you'll move daily must be light enough to reposition correctly every time.
Floor condition underneath also matters, since cracked or slick concrete undermines any ramp. If you're resurfacing the slab as part of the project, North Shore garage floor advice covers epoxy finishes that affect traction and cleaning. No single type serves every reader, and any product claiming otherwise deserves skepticism.
Calculate Slope Clearance and ADA Context
Slope math is straightforward, and doing it on paper prevents expensive surprises. Divide rise by run, then multiply by 100 to get percent grade. If your threshold rises 8 inches and you have 80 inches of run, that's a 10% grade. Compress that run and the grade climbs fast.
The four-step process below turns your measurements into a grade you can compare against real limits.
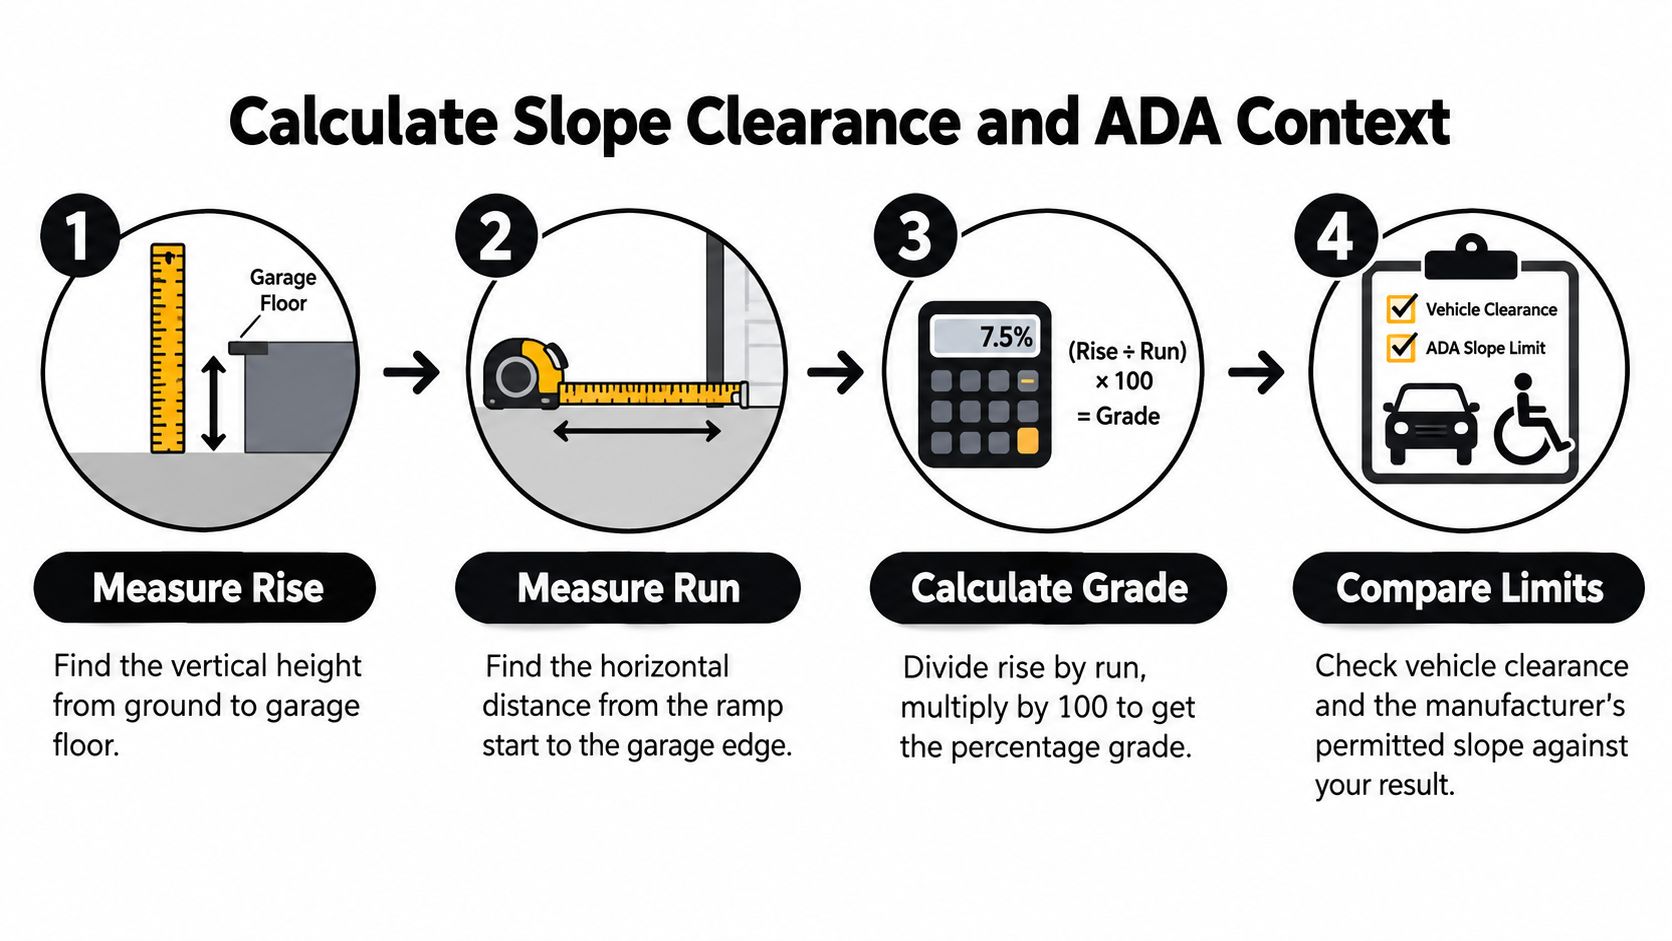
For vehicles, residential ramp grade guidance identifies approximately 10 to 12% as a practical grade target and 15% as a commonly recommended upper limit for straight ramps, while noting local requirements may be lower. Using that guidance, an 8-inch rise needs about an 80-inch run at 10% or roughly 67 inches at 12%. Steeper grades increase clearance, traction, and comfort problems, especially when surfaces are wet or icy.
Separate the Two Benchmarks
The ADA reference works differently. Its 1:12 ratio equals an 8.33% grade, so a 4-inch threshold would need roughly 48 inches of run and a 6-inch rise about 72 inches. That's a widely recognized pedestrian safety reference, useful when people walk beside or across the route. It is not automatically the right specification for a private vehicle ramp, and presenting it as one confuses buyers. A ramp slope calculator tool can help you test different rise and run combinations before committing.
Grade alone doesn't guarantee success. Check the vehicle's approach, breakover, and departure angles against the ramp profile, because bumpers and underbody components scrape at transitions even when the middle slope is fine. A transition zone at each end, often about half the main grade, reduces that scraping. Allow width for mirrors and steering correction, and keep drainage from pooling at the low point where tires and feet both need grip.
Practical rule: If the math only works at the steepest possible grade, the space probably needs a different design, not a shorter ramp.
Visibility at the entrance matters too, since drivers reversing toward a ramp need to see people crossing. Resources on ways to improve parking lot security address lighting and sight lines that apply to busy home driveways as well. The short video below walks through slope measurement in a real setting.
Always compare your calculated grade with the manufacturer's permitted slope for the specific vehicle or mobility device. That limit overrides any generic target.
Install Secure and Test the Ramp
Installation isn't complicated, but skipped preparation causes most failures. Start by reading the manufacturer's placement instructions for your specific model, since securement methods vary and generic advice can't replace them.
Choose a clean, stable surface and sweep away gravel, leaves, and loose debris that let a ramp rock or slide. Address standing water before placement, because a ramp sitting in a puddle starts with compromised traction. Orient textured or grooved finishes across the direction of travel so tires and wheels grip against the slope rather than channeling down it.

Positioning and Securement
Confirm full surface contact at both ends. A gap at the top creates a lip that catches casters, and a floating bottom edge shifts under the first real load. For vehicle-capable ramps, verify rated capacity against the actual imposed load, including passengers, fuel, cargo, and dynamic forces from driving on or stopping abruptly. Check whether the rating applies to the complete vehicle, each wheel, or a pair of ramps. Those are very different numbers wearing the same label.
Edge protection deserves separate attention. Under OSHA's dockboard requirements, ramps must support the loads placed on them and be designed, constructed, and maintained to prevent vehicles from running off the edge. Adequate capacity alone doesn't stop a tire leaving the side when usable width or alignment is poor. Use anchoring or restraint exactly as the manufacturer specifies, and check transition zones at both ends for abrupt angles. Detailed wheelchair ramp installation guidance covers placement checks that translate well to threshold setups.
For mobility-device ramps, watch for the classic failures. A ramp that shifts during loading, an unsupported edge, a top lip, or a surface too smooth for wet tires can destabilize small front casters in a second.
Testing Before Regular Use
Test slowly and deliberately. Run an unloaded test first with the lowest-clearance vehicle or the empty mobility device, watching for scraping, rocking, or edge drift. Follow with a supervised loaded test while a second person watches from the side, not from behind the device.
Stop immediately if you hear scraping, feel shifting, or see water pooling where wheels travel. Fix the cause rather than learning to tolerate it. A ramp that moves slightly on test day will move more on a wet morning when everyone's in a hurry.
Load Mobility Devices Without Compromise
The human route through a garage deserves its own plan, not leftovers from the vehicle plan. Wherever possible, keep the wheelchair, scooter, or rollator path separate from moving tires. A person shouldn't have to share a narrow incline with a reversing car, and a driver shouldn't have to judge clearance around someone mid-slope.
Don't assume a vehicle ramp doubles as an accessible walking route. Its slope, cross slope, and surface were chosen for tires. Someone with a walker crossing that surface sideways faces drift and tipping risks the driver never encounters.
A Preloading Routine That Works
Build a short routine and use it every time. Inspect the ramp surface and the device, confirm full contact at both ends, and align casters or drive wheels straight with the ramp before starting. Proceed slowly without stopping mid-slope if you can avoid it, and engage the device's braking system whenever stationary. Caregivers should position themselves where they can assist without standing downhill of a loaded chair.
- Load basis: Count user, device, accessories, and anything carried, not shipping weight.
- Clearance: Verify usable width exceeds device width with room to correct steering.
- Traction: Wet tires on smooth surfaces lose grip before the motor loses power.
- Edge awareness: Small wheels near an unprotected edge need slow, straight alignment.
For planning geometry, U.S. Access Board ramp specifications set a 1:12 maximum running slope, a minimum clear width of 36 inches between handrails where provided, and a 1:48 maximum cross slope. These are accessibility standards rather than universal requirements for private residential vehicle ramps, but they're a conservative starting point when people share the route. Manufacturer slope and capacity limits still take priority over any generic calculation, and a gentler ratio that doesn't fit your garage isn't safer if it forces awkward turns. Advice on moving and transporting a scooter safely covers handling habits that pair well with this routine. For final accessibility decisions, check local requirements or get qualified review rather than relying on product packaging.
Maintain Store and Recheck Garage Access
A ramp that tested well in dry weather can become a hazard by winter. Build a repeatable inspection habit instead of trusting the installation forever.
Store portable equipment where it won't become a trip hazard or get driven over accidentally. Leaning a ramp against a garage wall beside the pedestrian door invites exactly the fall you bought it to prevent. Keep the manufacturer's instructions and load information with the ramp or photographed on your phone, because capacity details matter most when a different caregiver or a heavier device enters the picture months later.
Inspection and Weather Checks
Inspect surfaces regularly for wear, loose hardware, corrosion, and reduced traction. Clear water, snow, ice, and oil before use rather than after someone slips. Heavy rain and freezing weather deserve a fresh inspection every time, since drainage patterns shift, pooled water freezes at the low point, and a textured surface that gripped in October can skate in January.
Equipment limits don't expire, but conditions change around them. As OSHA ramp guidance summarized for operators states, vehicle manufacturers' limits and the ramp manufacturer's instructions control powered-equipment use, and operators shouldn't travel on ramps whose slope or conditions exceed the manufacturer's recommendation. That applies on day ninety as much as day one.
Reassess the whole setup whenever something changes.
- New vehicle: Recheck ground clearance and approach angles before the first crossing.
- New mobility device: Recalculate combined load and width, don't assume the old ramp works.
- Changed parking position: Confirm the pedestrian route still exists beside the car.
- Floor work: New coatings or threshold repairs alter transitions and traction.
The buying decision, in the end, is simple to state and worth doing carefully. Match the ramp to the intended load, calculate geometry from verified site measurements, respect equipment limits, provide independent accessible passage where people need it, and test before routine use. Then keep testing as seasons and equipment change.
A safer garage entrance combines the right equipment with controlled placement and repeated inspection, not a one-time purchase.
If you're planning garage access for a scooter, powerchair, rollator, or wheelchair, DME Superstore offers ramps and mobility equipment with clear specifications, capacity details, and compatibility information to help you match products to your measured entrance. Browse the selection, compare load ratings against your site profile, and use the available support to confirm fit before you buy.
