



You're standing in the hallway with a caregiver and a tape measure. The trial chair fits the person's hips, but it won't turn into the bathroom. Getting to the toilet still requires the same risky walk that prompted the appointment.
That's why a power wheelchair assessment needs to answer more than which chair to buy. It must connect the person's body, daily tasks, home layout, driving ability, and available help. The assessment isn't finished until someone has also planned training, checked caregiver skills, and arranged follow-up after home use.
What Every Power Wheelchair Assessment Must Record
A bathroom turn can expose a problem that a showroom trial misses. Before discussing models, record what the person needs to accomplish and what might prevent it. A chair that provides comfortable sitting but leaves an essential room unreachable hasn't solved the mobility problem.
The RESNA Wheelchair Service Provision Guide frames assessment as a clinical and environmental process, with documentation of medical history, physical function, mobility, activities, and anticipated environments. It also recommends validated outcome measures to compare function before, during, and after equipment provision, including comparisons across users and equipment types.
Use a visit cover sheet
Keep these domains together rather than scattering them across referral notes, supplier emails, and therapy records.
Power wheelchair assessment domains to document
| Domain | Record these items | Decision it changes |
|---|---|---|
| Diagnosis and prognosis | Primary diagnosis, expected change, secondary conditions | Whether power is needed now and later |
| Surgical and treatment history | Past surgery, planned procedures, precautions | Seat height, hip angle, transfer method |
| Range of motion and alignment | Joint limits, pelvic tilt, trunk and head position | Cushion, back, headrest, positioning power |
| Transfers | Surface, help needed, number of people, fall risk | Seat height, armrests, transfer side |
| Current mobility skills | Cane, walker, or manual chair tried, and why it failed | Power versus a simpler device |
| Daily activities | Toileting, eating, dressing, grooming, bathing in usual rooms | Drive controls and access features |
| Environments | Doorways, turns, ramps, vehicle, work or community sites | Turning radius, range, transport tie-downs |
| Outcome measure | A validated score before provision | Whether the chair later improved participation |
Start with diagnosis and prognosis, but don't stop at the diagnosis label. Record whether function is expected to improve, remain stable, or decline. Secondary conditions, such as pain or limited endurance, may change what the person can sustain even when they can complete a brief task.
Next, clarify surgery and treatment plans. A pending procedure or current precaution can change the acceptable sitting position and transfer approach. Record joint movement and alignment without assuming every asymmetry should be corrected.
Turn observations into decisions
Watch transfers and current mobility rather than relying only on descriptions. Ask which daily activities are missed, delayed, or completed with unsafe help. Then identify the rooms, vehicle, workplace, and community locations the person uses.
Seat width, turning radius, weight capacity, controls, seating support, and battery range belong beside those findings. A narrow base may improve access, but it's not useful if the seating cannot accommodate the person. Longer range won't compensate for a control method they can't operate.
Practical rule: Write the task and obstacle before writing the feature. Bathroom access is the goal; a compact turning footprint is a possible means.
Our guide to choosing a wheelchair can help caregivers understand the equipment categories while the clinician establishes the prescription. Copy the domain table onto the chart cover, leaving room for measurements and unresolved questions during the body exam.
How to Complete the Body and Seating Exam
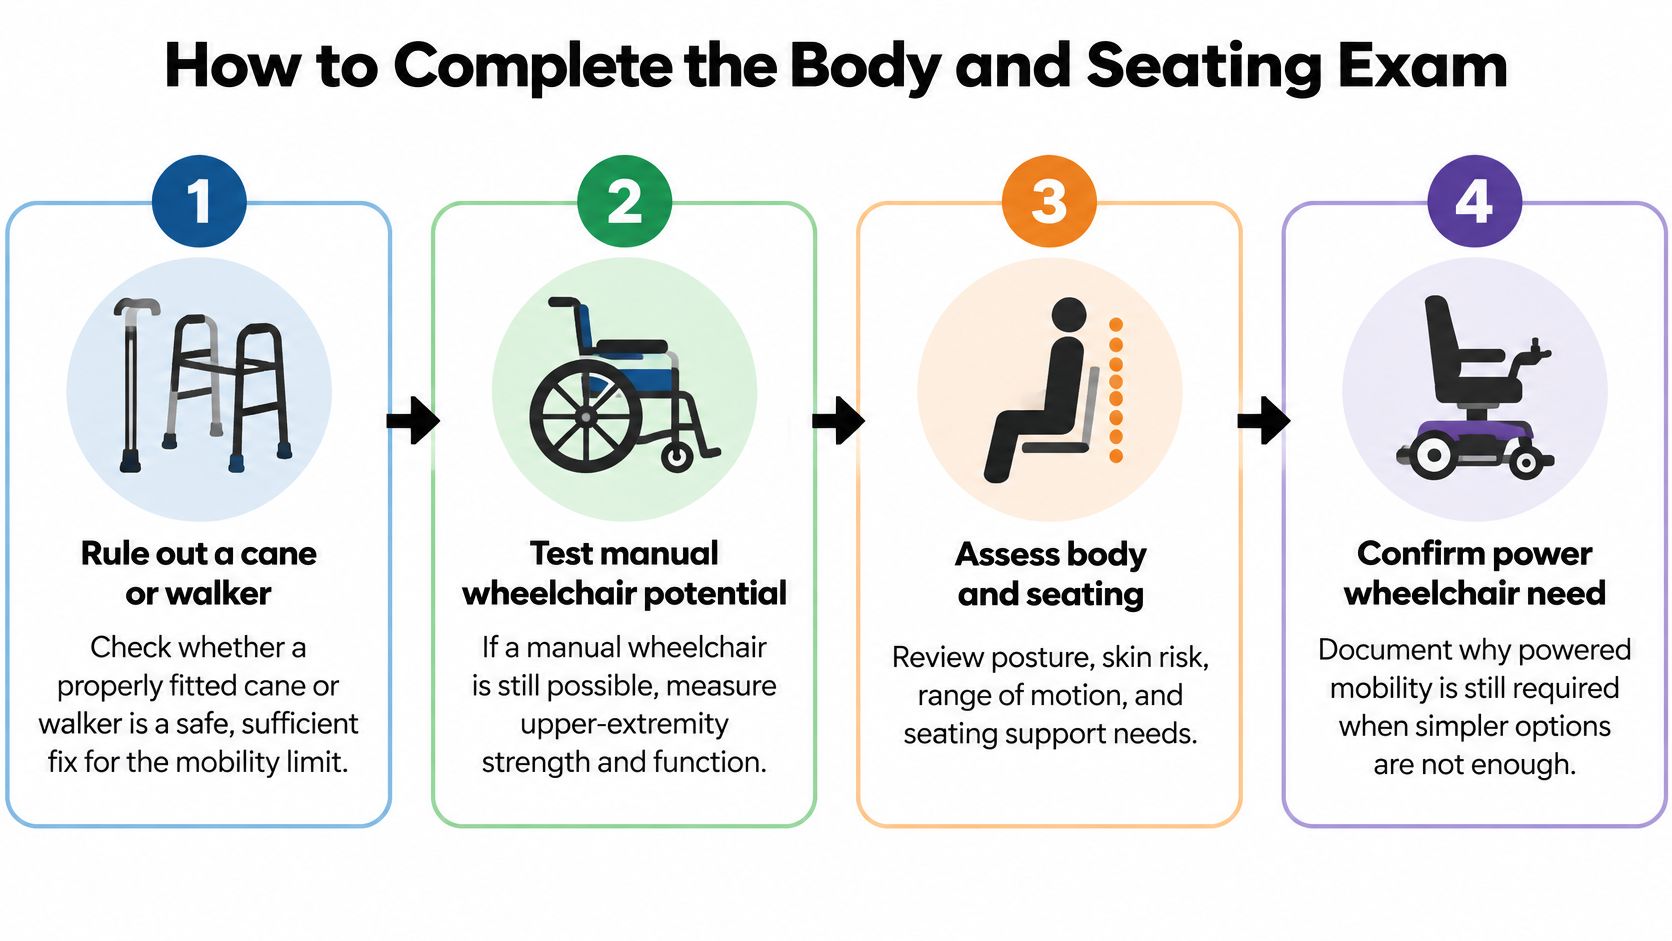
A diagnosis explains part of the problem. The examination must establish what the person can safely do, which simpler options are insufficient, and what seating arrangement supports useful movement.
The CMS power mobility devices guidance connects eligibility to in-home mobility-related activities of daily living, or MRADLs, and requires consideration of a properly fitted cane or walker, manual propulsion, and available caregiver assistance.
Establish the mobility need
- Rule out a properly fitted cane or walker. Observe the person using the aid under appropriate supervision. Record why it doesn't safely and sufficiently resolve the limitation, such as loss of balance, pain, or inability to sustain the route. Don't mistake a successful stand for safe household walking.
- Test manual wheelchair potential. Assess upper-extremity strength, movement, coordination, pain, and endurance in an optimally configured manual chair. Trial propulsion indoors rather than inferring ability from grip strength alone. Name whether a willing, capable caregiver can push the chair when needed, including whether that help is available during daily routines.
- Connect the limitation to household tasks. Document toileting, eating, dressing, grooming, and bathing in their customary locations. Instead of writing limited mobility, describe the consequence: the person cannot reach the bathroom safely or arrives at the eating area too fatigued to complete the meal.
Measure in the intended sitting position
-
Take body measurements with a firm tape measure. Measure seated hip width for seat width and thigh length from the back of the pelvis to behind the knee for seat depth. Measure lower-leg length for footplate or seat-to-floor planning, accounting for footwear and the cushion. Record elbow height for armrests, and document left and right separately when they differ.
Consider a hypothetical bariatric user whose seated hip width exceeds an 18-inch seat. That seat is already an unsuitable starting point, regardless of its weight rating. For a shorter adult, check whether lowering footplates to support the feet would leave them striking the floor.
- Observe posture and skin risk. Record pelvic tilt, lateral trunk lean, head position, and whether the person can change position. Check the sitting bones and tailbone area for pressure concerns, following consent and local examination procedures. Distinguish a flexible posture from a fixed limitation before adding corrective support.
- Trial the cushion and back together. Recheck arm support, control access, and tabletop reach after positioning the pelvis. If the person slides forward to reach the table, investigate the setup rather than telling them to sit back. Our wheelchair cushion guide explains options to discuss during a seating trial, not substitutes for that trial.
- Confirm the transfer arrangement and write a goal. Post-surgery hip precautions may rule out a low transfer even when the seat feels comfortable. Test the intended surface and usual transfer side within those precautions. A useful written goal is independent toilet transfer on the usual side, with the required setup and safety conditions recorded.
How to Test Skills Rooms and Daily Routes
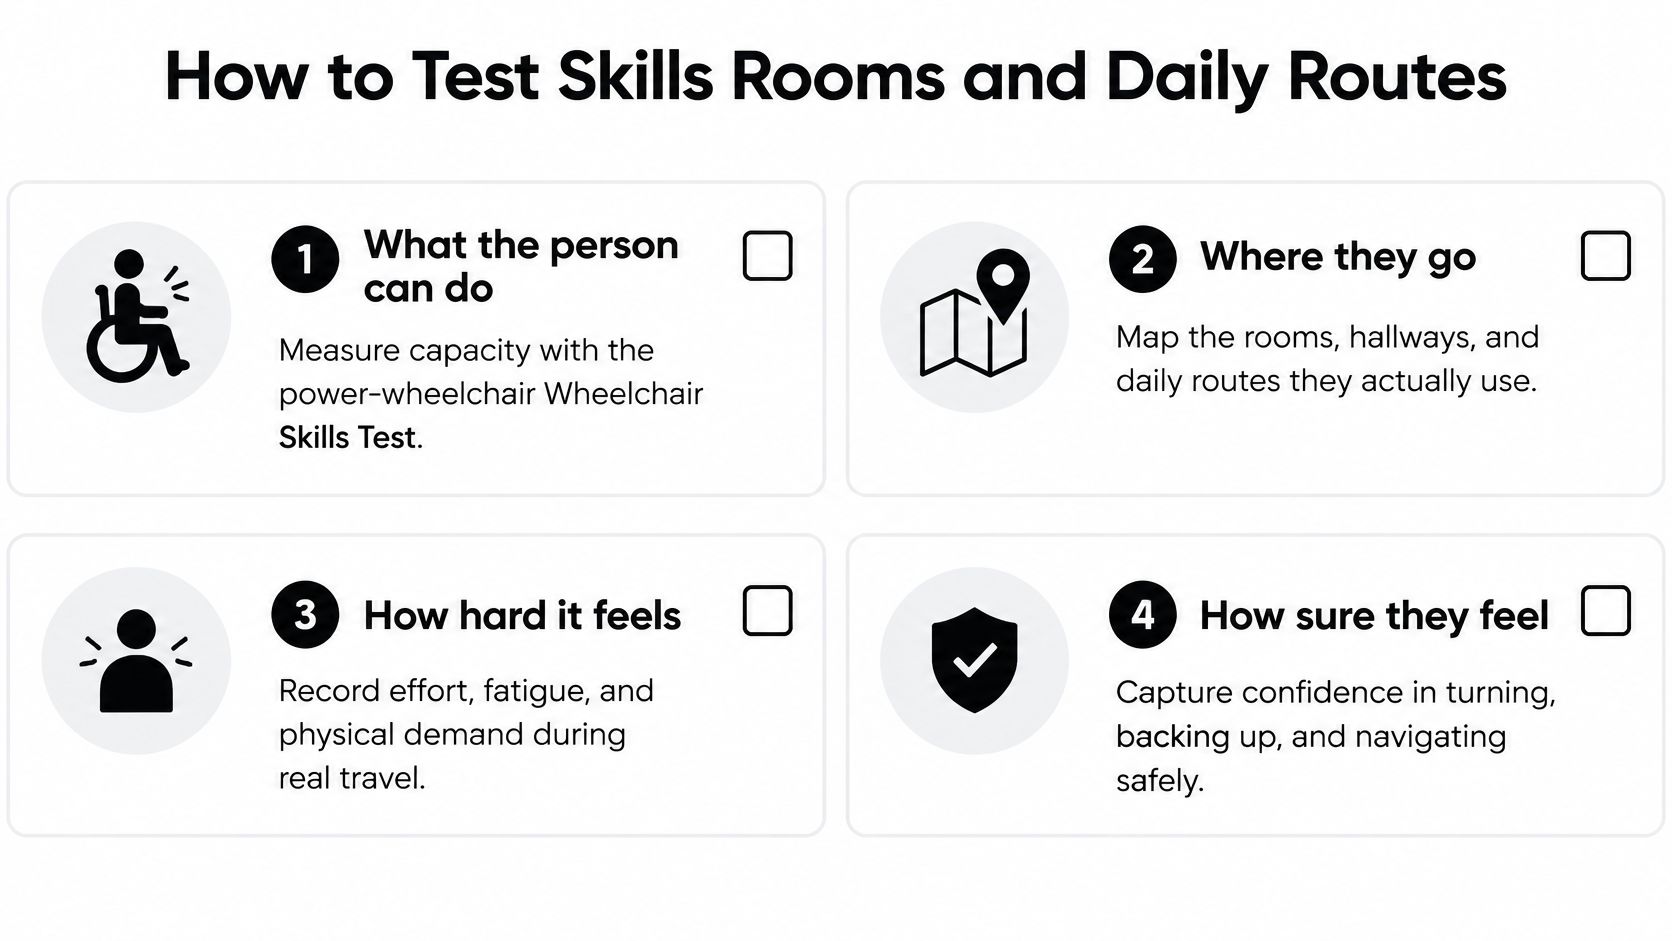
Capacity, participation, difficulty, and confidence are different findings. Someone may steer accurately but avoid the bathroom because they're frightened of backing out. Another person may feel confident while repeatedly clipping the doorway.
Skills and participation measures for power chairs
| Measure | Scope | Sample item to trial |
|---|---|---|
| Wheelchair Skills Test, power version | Capacity on 32 skills | Turn the chair on, drive forward and back, clear a threshold |
| Late-Life Disability Index | Participation in 16 life activities | Whether a daily activity is limited or not done |
| Life-Space Assessment | Independence, distance, and frequency | Rooms of the home versus places beyond the home |
| Assistive-technology outcomes profile | Perceived difficulty during activity | How hard reaching or moving feels to the user |
| Powered-wheelchair confidence scale | Confidence operating the device | Comfort on a ramp or in a tight turn |
The multidimensional powered-wheelchair outcomes toolkit used the power Wheelchair Skills Test for 32 skills and the Late-Life Disability Index for 16 life activities, alongside life-space, perceived-difficulty, and confidence measures.
Use the appropriate tool's instructions and scoring rules. The sample trials above help identify relevant tasks, but they aren't substitutes for administering a standardized measure correctly.
Find the reason a route fails
For capacity, watch actual control. A joystick hand that cannot maintain a line through a narrow bathroom doorway calls for investigation of support, control placement, programming, or another control method. More encouragement alone won't resolve a physical access problem.
For participation and life-space, ask where the person goes. They might complete a supervised kitchen trial yet remain confined to the bedroom during the day because someone leaves furniture across the route. A successful test doesn't prove independent access during ordinary routines.
For perceived difficulty, ask about effort and discomfort after the task. A person may reach the sink successfully but find sustained control so tiring that they avoid grooming there.
For confidence, ask what feels unsafe and observe the response. A capable driver who freezes before backing through a doorway needs a different plan from someone who cannot stop reliably.
Test the complete route
Start with indoor mobility-related tasks, then document outdoor, work, transportation, and emergency routes as participation goals. Our electric wheelchair guide for home use can help caregivers prepare a room-by-room access list.
Measure the usable doorway opening with the door in its normal position. Include furniture, footplates, joystick projections, approach angles, and space to reverse. At each routine destination, check entry, turning, reach, transfer setup, and exit.
- Bathroom: Can the person reach the sink and position beside the toilet without trapping a footplate?
- Ramp: Can the trial chair negotiate the actual surface and transition under clinician supervision? Don't attempt an obstacle outside its stated operating limits.
- Vehicle: Does the chair fit the van opening and loading arrangement? Record whether the plan is cargo transport or occupied wheelchair travel.
- Emergency route: Can the person reach the planned safe exit, and who assists if the usual route is blocked?
Finish with pass, supervised-pass, or fail for each relevant skill and room. Record the assistance, settings, and equipment used so another therapist can understand what the result means.
Medicare Deadlines That Make the File Count
For Medicare power mobility, the CMS coverage document describes a face-to-face encounter within six months before the order date and receipt of the written examination report by the supplier within 45 days after the examination and before delivery. Confirm the current applicable requirements with the treating practitioner and supplier before scheduling or relying on a deadline.
A recommended chair is not an approved file. The treating practitioner's examination, functional findings, order, and supplier documentation must form a connected record.
Track the paperwork sequence
Medicare timing for a power mobility order
| Requirement | Deadline | If it is missed |
|---|---|---|
| Face-to-face exam by the treating practitioner | Before the order is written | Order is not valid for the base item |
| Physical exam plus in-home MRADL assessment | During that face-to-face visit | Community wishes alone do not establish coverage |
| Encounter relative to the standard written order | Within the encounter window described above | A new face-to-face visit is required if the encounter is outside the window |
| Written exam report to the supplier | Within the report window described above and before delivery | Supplier cannot deliver on that file |
| Less complex mobility ruled out | Documented in the same report | Power mobility is not shown to be necessary |
Keep a caregiver tracking sheet with the exam date, order date, report transmission, supplier receipt, and delivery status. Sending the report and confirming its receipt are separate actions. Save the confirmation rather than assuming an uploaded or faxed document reached the correct person.
An order written before the examination or a late report breaks the required sequence. Ask the treating practitioner and supplier to resolve the deficiency before delivery; a repeat visit and correctly sequenced documentation may be necessary. Don't assume that changing a date or adding a generic statement will repair the file.
Make the clinical reasoning visible
The note should contain a physical examination and an assessment of in-home MRADLs. Keep additional community-use needs separate so the reviewer can identify the household mobility justification.
The documentation should explain:
- Why simpler mobility isn't sufficient: Include the observed limitations with walking aids and manual mobility.
- Which home tasks fail: Name the activity, customary room, assistance required, and safety problem.
- Why the prescribed features are needed: Connect controls, seating, and access features to the findings.
- What was tested: Distinguish direct observation from caregiver report and measurements supplied remotely.
For therapists organizing functional findings and follow-up, the PatientNotes guide to PT progress notes is a useful documentation resource. A note template can improve organization, but it doesn't replace payer-specific examination and order requirements.
Our guide to power wheelchairs and Medicare provides caregiver-oriented context for the coverage conversation. Commercial plans, Medicaid, and VA programs set their own requirements; confirm their face-to-face, written-order, and report deadlines rather than applying Medicare's sequence automatically.
Paperwork check: Before delivery, ask the supplier to confirm that the examination report, order, and supporting clinical documentation are present and acceptable for the applicable payer.
Training Gaps and When to Reassess
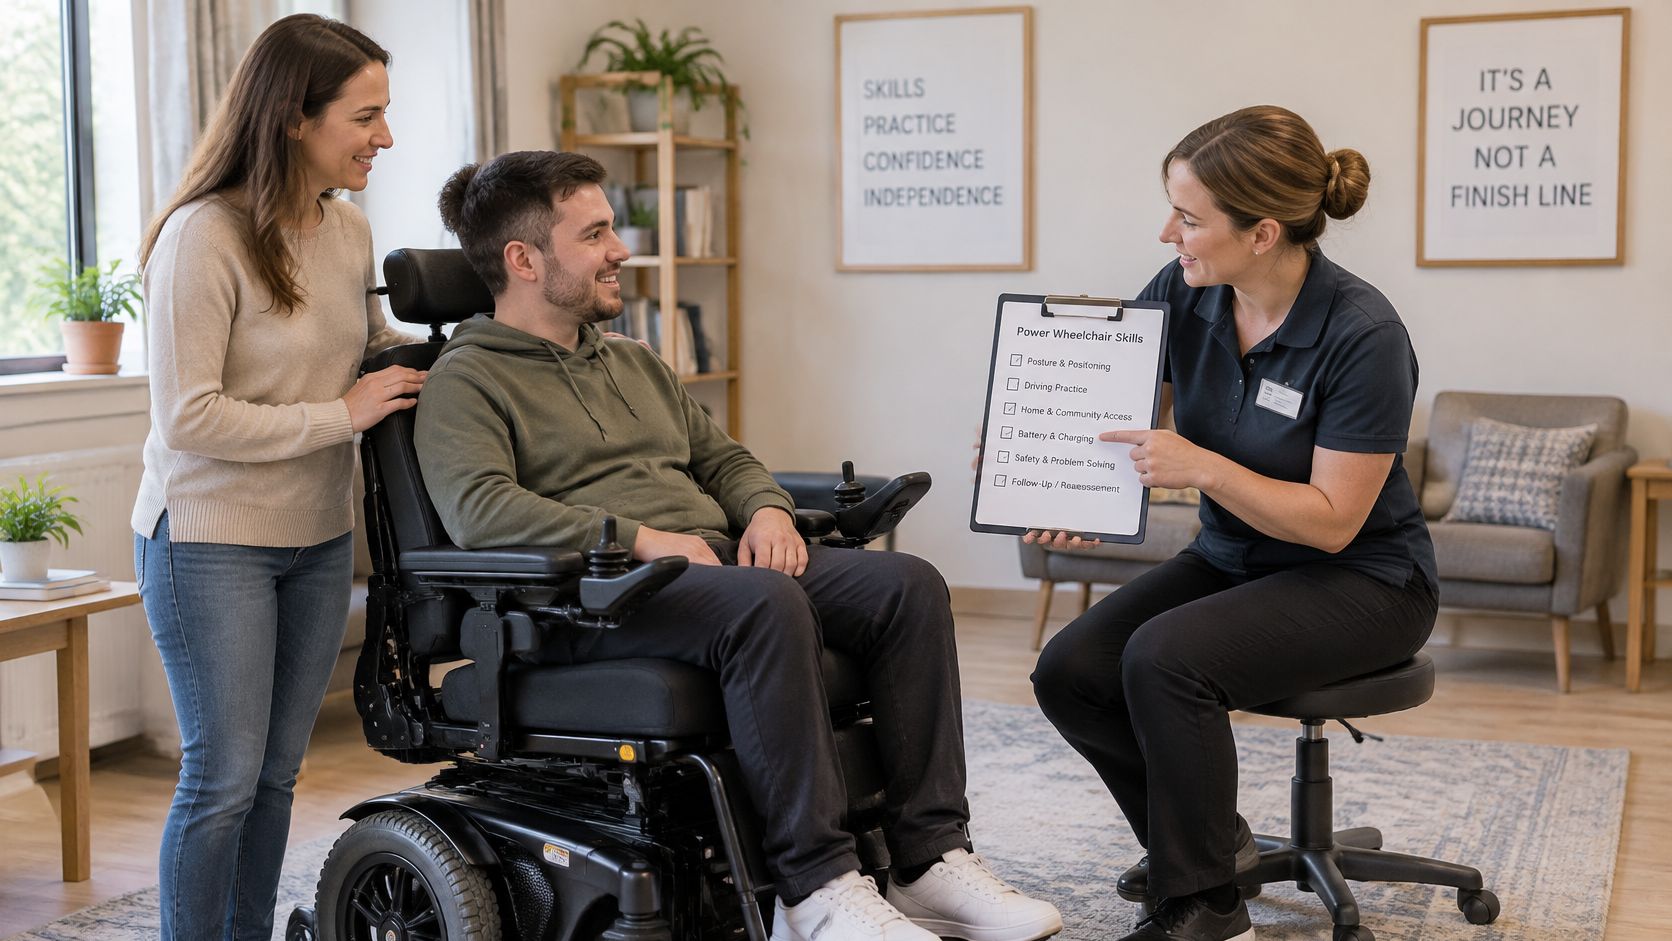
Approval day doesn't establish safe daily use. A complete file should name who teaches the user and caregiver, what they'll practice, how supervised sessions are scheduled, and when the team will review performance at home.
Rehabilitation literature on wheelchair-skills training associates training with better skills, confidence, and participation; a 2025 caregiver randomized trial compared self-study with remote training. Caregiver instruction deserves a documented plan, not just a handout placed beside the charger.
Assign practice and responsibility
Use the recorded skills results as the baseline. Prioritize failed and supervised-pass tasks rather than restarting the entire examination.
- Name the trainer: Specify the clinician or trained team member responsible for instruction and the caregiver who needs to attend.
- Schedule supervised practice: Include stopping, turning, doorways, transfers, ramps, outdoor surfaces, and transportation tasks relevant to the person.
- Check caregiver performance: Have the caregiver demonstrate charging, applicable folding or transport steps, and the agreed response to a failed transfer. Don't ask them to improvise a hazardous lift.
- Set the home review: Arrange reassessment after the first days of ordinary use, with a way to report problems sooner.
The plan should state how many supervised sessions are initially scheduled and what demonstrated abilities permit progression. There isn't a useful universal practice dose for everyone. A caregiver's availability and the user's fatigue may require shorter practice periods or a different support arrangement.
If the person cannot stop, turn, or transfer without a near miss, pause unsupervised use of that task and contact the clinical team. Determine whether the problem is training, programming, seating, controls, access, or a change in health.
Reassess when circumstances change
The Healthy Blue powered-mobility policy describes specialty assessment requirements and considerations for changing needs, including pediatric mobility. Treat reassessment as a response to function and circumstances, not age alone.
Arrange reassessment for
- Functional change: Clear improvement or decline.
- Safety events: A fall or near miss.
- Seating concerns: New pressure problems or postural change.
- Support changes: Caregiver turnover.
- Environmental changes: A move or an essential room that remains unreachable.
- Equipment problems: Repeated repairs or unreliable operation.
Seat elevation, alternative controls, and navigation aids help only when cognition, vision, hand function, floor plan, maintenance help, and charging routines have been assessed together. Very young children may be ready for powered mobility, while adults may need a different arrangement after surgery. Neither age nor an advanced feature substitutes for an individual trial.
Match the Finished File to Chair Specs
Start with body weight, the tightest doorway or vehicle opening, and the farthest routine trip. Keep the specialty PT or OT evaluation, domain sheet, skills findings, and applicable order dates together before comparing models.
Compare limits rather than labels
| Chart finding | Specification to compare | Decision to make |
|---|---|---|
| Body weight | Rated weight capacity | Choose adequate capacity with headroom, not a rating below the documented load |
| Seated hip width and thigh length | Seat width and usable depth | Reject seats that cannot accommodate the measured body |
| Tightest opening and approach | Overall width, length, turning footprint | Confirm the complete maneuver, not just straight-line clearance |
| Vehicle loading plan | Folded dimensions and lifting weight | Match the chair to the person loading it or the rated lift |
| Farthest routine trip | Listed battery range | Account for the return route and outdoor surfaces |
| Skills and seating findings | Controls and available supports | Keep essential clinical requirements intact |
For a heavier user, confirm the bariatric rating and applicable load limits with the supplier. A seat narrower than the measured hips remains unsuitable even when the base has sufficient capacity. Conversely, extra seat width can create an access problem without improving support.
If a lighter adult must load the chair into a car, compare folding arrangements and the actual weight they must lift. Don't trade away required trunk support merely to reduce transport weight.
Read product differences carefully
Our comparison options include the Pride Jazzy Carbon HD Bariatric Portable Powerchair, with a 400 lb capacity, 32 lb weight without battery, and Quick Fold feature; the Miracle Mobility Platinum 8000 Portable Powerchair, with a 396 lb capacity, 15 mile range, and 51 lb weight; and the ComfyGo MAJESTIC IQ-9000 Auto Recline RC Electric Wheelchair, with a 310 lb capacity, 58 lb weight, and 19 mile range.
Those figures don't establish equivalent seating, maneuverability, or control suitability. Battery-excluded weight also isn't the same measurement as a listing that doesn't specify battery removal. Confirm the lifting configuration before deciding.
Use the reclining electric wheelchair guide to frame positioning questions, then verify the exact model's functions. Recline alone doesn't establish that a chair supplies every support identified during the examination.
Compare each written requirement against the specifications on DME Superstore product pages. If a measurement or feature doesn't match the listing clearly, use our chat support to clarify it before ordering, rather than treating missing information as a pass.
DME Superstore offers power wheelchairs, mobility aids, and product specifications to help you compare equipment against a completed assessment. Visit DME Superstore with your seating measurements, access limits, and transport requirements, and use our chat support to clarify any listing details before you choose.
