


Installing a grab bar correctly means anchoring it securely into the wall studs. This isn't just about adding a handle; it's about creating a rock-solid support that can prevent a serious fall. This is one of the most important safety upgrades you can make in a bathroom, especially for anyone dealing with mobility challenges or simply planning for a safer future.
Why Installing Grab Bars Is a Non-Negotiable Bathroom Upgrade

Learning how to install grab bars in bathroom spaces is more than a simple home improvement task; it's a profound investment in safety, confidence, and independence. For many, this simple addition is the key to continuing to live comfortably and safely at home, whether they’re recovering from surgery, managing a chronic condition, or adapting to the changes that come with age.
The bathroom is, statistically, one of the most hazardous rooms in any home. The combination of water, hard surfaces, and the need to move between sitting and standing positions creates a high risk for slips and falls. The CDC reports that one in four older adults fall each year, with the bathroom being a prime location for these accidents. A well-placed grab bar can single-handedly transform this high-risk area into a secure space, offering a stable handhold exactly where it's needed most.
A Proactive Approach to Home Safety
It is a common misconception to wait for an accident to happen before making safety modifications. Installing grab bars is a forward-thinking, proactive measure that contributes to long-term well-being and provides peace of mind for both the user and their family. It is a functional tool that helps prevent injuries and supports daily routines with dignity.
True home safety involves creating an environment that is safe for everyone who uses the space. Grab bars provide a crucial benefit for:
- Older adults working to maintain their independence at home.
- Anyone recovering from an injury, illness, or medical procedure.
- Individuals with balance or mobility challenges of any kind.
- Visiting family members, like aging parents, or even young children who need a steady grip.
A strategically placed grab bar can drastically reduce the risk of a fall by providing a reliable point of support during tricky transfers—like stepping into a shower or getting up from the toilet. It’s a single modification that makes the entire household safer.
Creating an Accessible and Stylish Space
Many people delay installing grab bars because they associate them with a sterile, hospital-like aesthetic. The good news is that modern designs have evolved significantly. Today’s grab bars are available in a wide range of finishes, shapes, and styles that can beautifully complement your existing decor. You absolutely do not have to choose between safety and aesthetics.
This mindset is part of a larger concept called universal design, which aims to create spaces that are accessible to people of all ages and abilities. If you're interested in making your home safer and more comfortable, it’s worth understanding universal design principles for accessible homes. This approach shows how thoughtful, safety-oriented design can be seamlessly woven into a home's style.
In this guide, we’ll walk you through the entire installation process, step by step. You'll learn how to choose the right bar for your needs, find the perfect placement, and master the installation on any wall type you might encounter—from standard drywall and tile to solid masonry.
Your Pre-Installation Planning and Safety Checklist
Before you touch a drill, thorough planning is what separates a rock-solid grab bar from a potential safety hazard. This preparatory phase is the most critical part of the process, as it sets the foundation for a secure installation that you can trust for years to come.
Begin by evaluating your bathroom's layout to identify high-risk zones. Typically, these are beside the toilet (for assistance with sitting and standing), inside the shower (for stability on slippery surfaces), and along the tub's edge (for safe entry and exit). If possible, have the primary user walk through these motions. Pay close attention to where their hand naturally reaches for support—that is the optimal location for a grab bar.
Selecting the Right Grab Bar for the Job
Not all grab bars are created equal. The right choice depends entirely on the user's specific needs and the installation location. While a simple straight bar is the most versatile, other shapes offer unique advantages. An L-shaped or angled bar, for example, can provide both horizontal and vertical support next to a shower seat. A short vertical bar is perfect for the narrow wall space at a shower entrance.
Keep these key factors in mind when selecting your product:
- Grip and Texture: A bar with a peened or textured finish provides a much more secure grip than a smooth, polished one, especially when hands are wet and soapy. This feature is critical for preventing slips.
- Diameter: The standard is 1.25 to 1.5 inches in diameter. While a 1.5-inch bar is the most common and meets ADA guidelines, someone with smaller hands or arthritis might find a 1.25-inch bar easier and more comfortable to grip.
- Length and Shape: The length should correspond to the available wall space and the user's range of motion. A 24-inch or 36-inch horizontal bar works well along a long shower wall, while a 16-inch or 18-inch vertical bar is ideal for an entryway.
Confirming Weight Capacity and Material Quality
A grab bar must be able to support a person's full body weight under sudden pressure. The ADA requires that grab bars support a minimum of 250 pounds, but for bariatric users or for added peace of mind, look for models rated for 500 pounds or more. This weight rating should be clearly stated on the product's packaging.
The demand for robust, reliable equipment has grown significantly. The bathroom assist devices market reached USD 4.76 billion in 2023 and is projected to continue climbing, driven by an aging population and a greater focus on home safety. This demand has spurred innovation, leading to a 29% production increase in high-quality, antimicrobial stainless steel grab bars designed to meet stringent safety standards.
Locating Wall Studs for a Secure Anchor
Let's be clear: the safest, most secure method for installing a grab bar is to anchor it directly into the wall studs. These are the vertical wood beams that form the structural frame of your house.
CRITICAL: Never rely on drywall, plaster, or tile backer board alone to support a grab bar. These materials are not strong enough and will fail under load, leading to a dangerous situation.
A quality electronic stud finder is the best tool for this task. Slide it horizontally across the wall; when it signals, you've found the edge of a stud. Mark both edges with a pencil to pinpoint the center—this is your drilling target. In most modern construction, studs are spaced 16 inches apart on-center, so once you find one, you can often measure to locate the next. Proper anchoring is absolutely essential for enabling safe transfers and maintaining balance, a core principle of good caregiver support. You can learn more by checking out our essential tips for caregivers on safe transfers.
If a stud isn't located exactly where you need the bar, do not compromise on placement. Specialized mounting systems, like heavy-duty toggle bolts or products like WingIts, are engineered for hollow walls. However, you must verify that they are specifically rated for grab bar installation before purchasing. If you're undertaking a larger bathroom project, understanding all the material and budget considerations is key; you might find a comprehensive guide to rural bathroom renovations helpful for the big picture.
Mastering Perfect Grab Bar Placement and Height
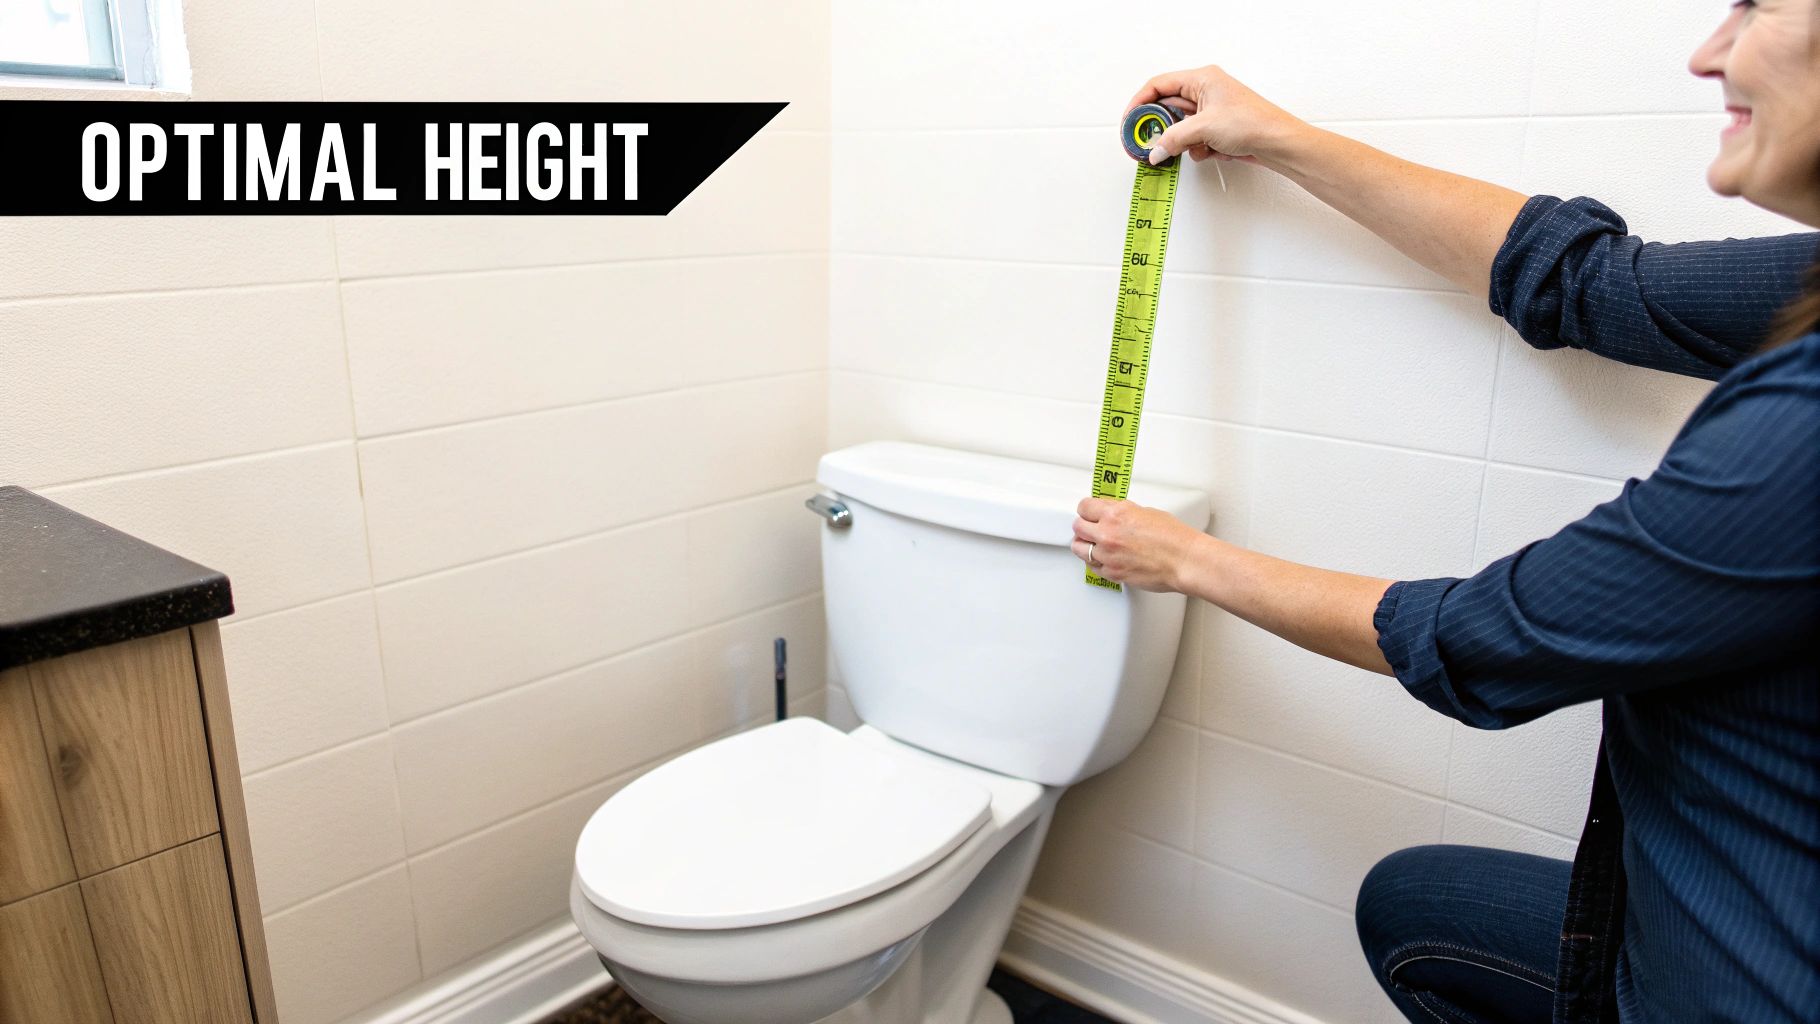
Knowing the "rules" for grab bar placement is important, but understanding the why behind them is what leads to a truly effective installation. It’s not just about hitting a specific number on a tape measure; it’s about creating a support system that works in harmony with a person's natural movements, height, and specific physical needs.
The Americans with Disabilities Act (ADA) provides an excellent starting point. These guidelines are the industry standard for public spaces, based on extensive research into ergonomics and accessibility. For a home installation, we can use these as a foundation and then customize the placement for the individual user.
The goal is simple: a grab bar should be located exactly where a hand instinctively reaches for support during a moment of instability. This is why a one-size-fits-all approach is often inadequate. A bar that’s perfect for someone who is five feet tall might be completely ineffective for someone over six feet.
Customizing Placement for the Primary User
Before drilling, it is essential to involve the person who will rely on these bars daily. Have them go into the bathroom and simulate the actions they perform.
- Have them reach out as if they were losing their balance. Where does their hand naturally land on the wall?
- Watch them sit and stand at the toilet. When they reach for support, is their arm at a comfortable and functional angle?
- Observe them stepping into the tub or shower. What height feels most secure for that initial grip?
This practical assessment is far more valuable than blindly following a diagram. It allows you to tailor the placement for maximum leverage and comfort, turning a simple safety device into a personalized, functional tool.
The optimal position for grip is where the user's elbow is slightly bent. This angle provides the best possible leverage. A fully extended arm or a sharply bent elbow reduces the user's ability to push or pull effectively.
Optimal Placement in Key Bathroom Zones
While customization is key, there are evidence-based locations that offer the best support in the most common high-risk areas of the bathroom. Use these as your starting points.
Supporting Toilet Transfers
The motion of getting on and off a toilet is a frequent point of instability. A well-placed grab bar can make this movement significantly safer and easier.
- Horizontal Bar Placement: The standard recommendation is one or two horizontal bars. ADA guidelines suggest mounting these between 33 and 36 inches from the floor. This height generally aligns with the hip level of a seated adult, allowing them to use their arm strength to push up or lower down with control. A bar that's 24 to 36 inches long provides an ample gripping surface.
- Real-World Example: If the user has a stronger right side, installing a 32-inch horizontal bar on the wall to their right, with the front of the bar positioned about 12 inches from the front of the toilet bowl, will provide an ideal leverage point for standing.
Enhancing Shower and Tub Safety
The wet, slippery environment of a shower makes grab bars an essential safety feature. The strategy here is to provide a continuous line of support for the entire process—getting in, bathing, and getting out.
Common Shower and Tub Placements:
| Location | Recommended Orientation | Ideal Height (from floor/tub bottom) | Purpose |
|---|---|---|---|
| Shower/Tub Entrance | Vertical | Spanning 33-48 inches | Provides a solid handhold for stepping over a tub wall or shower curb, useful for people of different heights. |
| Long Back Wall | Horizontal | 33-36 inches | Offers a continuous rail for support while standing, balancing, or moving around inside the tub or shower. |
| Control Wall | Horizontal or Angled | 33-36 inches | Gives the user something to hold onto while adjusting water controls, a time when one hand is occupied. |
A vertical bar at the entrance is particularly critical. Occupational therapists often recommend this placement first because entering and exiting the shower is where the risk of falling is highest. A taller vertical bar is often preferable as it provides a handhold for a wider range of heights and can even assist someone in getting up from the floor after a fall. Remember to think through how to install grab bars in bathroom areas as a complete safety system, ensuring a support point is always within easy reach.
Your Step-by-Step Guide for Different Wall Types
Now we arrive at the installation itself. Knowing how to install grab bars in bathroom walls correctly is paramount, as the technique changes depending on the wall's construction. Each wall type requires a specific approach to create a rock-solid hold you can trust with your full weight.
We will walk through the process for the four most common wall materials. Getting this part right is non-negotiable for safety. A grab bar is only as strong as its connection to the wall.
Mounting into Wood Studs: The Gold Standard
Anchoring your grab bar directly into wood studs is the strongest and most reliable method possible. It creates a direct connection to your home's structural frame and should always be the primary goal.
Once you’ve used your stud finder to locate and mark the center of two adjacent studs, you are ready to proceed. Hold the grab bar against the wall, aligning it with your height and position marks. Use a level one last time to ensure it’s perfectly horizontal or vertical.
With the bar held firmly in place, use a pencil to trace the mounting holes at each end. Set the bar aside and prepare to drill the pilot holes.
- Drill Bit Selection: Choose a drill bit that is slightly smaller in diameter than the mounting screws provided with your bar. A 1/8-inch or 3/16-inch bit is typically required for standard lag screws.
- Drilling Depth: A useful technique is to wrap a piece of painter's tape around your drill bit to mark the required depth. You want to drill at least 1.5 inches into the wood stud itself, beyond the drywall or tile.
- The Action: Drill your pilot holes directly on your marks. Keep the drill perpendicular to the wall and apply steady, even pressure.
Finally, place the grab bar back over the holes, insert the screws, and use a socket wrench or drill to tighten them securely. They should be snug enough that the bar is completely flush and immobile, but be careful not to overtighten and strip the wood.
Tackling Hollow Walls with Secure Anchors
What happens when there is no stud exactly where you need one? This is a common challenge, but it does not mean you must sacrifice safety. The solution is to use specialized hollow-wall anchors designed specifically to handle the heavy loads a grab bar must support.
Let's be clear: standard plastic drywall anchors are completely unsafe for this application. You need an anchor that distributes the load over a wide area behind the wall surface. For this, toggle bolts are a reliable and trusted option.
A toggle bolt is a two-part anchor: a screw and a spring-loaded "wing." You drill a hole just large enough for the collapsed wing to pass through. Once inside the wall cavity, the wing springs open, creating a strong brace against the back of the drywall. As you tighten the screw, it pulls the wing tight against the interior wall surface, creating an incredibly secure anchor point. These anchors are often rated to hold over 300 pounds each, making them a reliable choice when studs are not available.
Installing Grab Bars on Ceramic Tile
Drilling into tile can feel intimidating, but with the right tools and a patient approach, it is entirely manageable. The primary concern is cracking the tile, which can be easily avoided.
First, place masking tape over the area where you need to drill. This serves two purposes: it provides a non-slip surface to mark your drill point, and it prevents the drill bit from "wandering" across the slick tile when you begin.
Pro Tip: Never use a standard wood or metal drill bit on tile. You must use a glass-and-tile bit or a diamond-tipped hole saw. Using the wrong bit will, at best, be ineffective and, at worst, will shatter your tile.
Start drilling at a very slow speed with gentle, consistent pressure. Ensure your drill's hammer function is turned off. Applying a small amount of water to the drill bit can help keep it cool and reduce friction. Once you are through the tile, you can switch to a standard bit appropriate for the material behind it (wood or drywall).
After the bar is mounted, a final, crucial step is to apply a thin bead of clear silicone sealant around the edges of the mounting plates. This creates a waterproof barrier, preventing moisture from seeping into the wall cavity where it could cause mold and structural damage. The demand for these safe solutions is growing, with the global bathroom grab bars market valued at about USD 1,431.5 million in 2024. Projections show this market more than doubling by 2030, reflecting the increasing focus on safety and accessibility. You can learn more about the trends in the bathroom accessories market to see how the industry is evolving.
Securing Grab Bars to Masonry Walls
If your bathroom walls are concrete, brick, or cinder block, you will need different hardware to achieve a secure installation. In this case, sleeve anchors are the appropriate choice.
A sleeve anchor is a bolt encased in a metal sleeve. You drill a hole with a masonry bit, then insert the entire anchor assembly. As you tighten the bolt, it pulls a cone-shaped plug into the sleeve, forcing it to expand and grip the inside of the hole with immense force.
Key Steps for Masonry Installation:
- Use a Hammer Drill: A standard drill will struggle with masonry. A hammer drill, which combines rotation with a rapid hammering action, is designed for this task.
- Match the Bit and Anchor: Your masonry drill bit must be the exact same diameter as the sleeve anchor you are using. This information will be on the anchor's packaging.
- Clean the Hole: After drilling, use a small brush or compressed air to remove all dust and debris from the hole. A clean hole is essential for the anchor to expand properly and achieve maximum holding power.
For situations where drilling is not an option, such as around a bathtub in a rental property, you might consider a temporary solution like a Medline Clamp-On Bathtub Grab Bar. It provides good support without permanent modification. However, for permanent, high-load-bearing support, a properly anchored bar is always the superior choice.
Final Safety Checks and Long-Term Maintenance
Your new grab bar is installed, but the job isn't quite finished. Before it is used, you must perform a final "stress test" to confirm its stability. This is the most important step of the entire installation.
First, give the bar a firm tug straight out from the wall. Then, apply downward pressure. Finally, if you can do so safely, hang your body weight on it, mimicking the force it would need to support during a slip. Test the bar at several points—in the middle and near each mounting flange.
There should be zero movement, wiggle, or give. None. If you feel even the slightest shift or hear a creaking sound, stop immediately. The installation is not secure. You must re-examine your work, tighten the screws, or reassess your anchoring method before the bar is safe to use.
This diagram shows the basic layers you're working with, which is why choosing the right anchor for your specific wall is so foundational to getting a secure mount.

Whether you're dealing with wood studs, drywall, tile, or masonry, using the correct technique is what makes the difference between a decorative accessory and a true safety device.
Creating a Simple Maintenance Routine
A grab bar is a long-term safety feature, and a small amount of upkeep ensures it remains effective for years. Think of it like checking the air in your tires—it’s a quick, simple habit that prevents major problems. We recommend setting a calendar reminder to perform these checks every few months.
This does not need to be a major task. A quick inspection is all that is required:
- Give It a Wiggle: Re-do the same stress test you performed right after installation. Over time, minor shifts in a home's structure can cause screws to loosen slightly.
- Inspect the Mounts: Look closely where the mounting plates meet the wall. There should be no cracks forming in the drywall or grout, and no gaps should be opening up.
- Check the Finish: Give the bar a quick inspection for any signs of rust or corrosion. This is especially important in a humid shower environment. High-quality stainless steel bars are very resistant, but it's still good practice.
A grab bar isn't a "set it and forget it" installation. Regular, quick inspections can identify a loose screw before it becomes a safety failure, ensuring the bar provides reliable support when it's needed most.
Proper Cleaning for Different Finishes
Keeping your grab bars clean is simple, but the method depends on the material. Using harsh, abrasive cleaners or steel wool can easily scratch the finish, making it more susceptible to rust.
For the most common finishes, a gentle approach is always best:
- Stainless Steel and Chrome: A soft cloth with mild soap and water is perfect. To remove hard water spots, a 50/50 mixture of white vinegar and water will restore the shine.
- Matte or Coated Finishes: Use only gentle, non-abrasive cleaners. A microfiber cloth is ideal as it will not damage the surface.
By incorporating these quick checks and gentle cleaning habits into your routine, you can be confident that this vital safety feature will remain a dependable part of your bathroom for years to come.
Common Grab Bar Installation Questions Answered
Even with careful planning, questions can arise during the installation process. Installing grab bars isn't just about following steps; it's about knowing how to handle the unique challenges your bathroom walls might present.
Let's address some of the most common questions that pop up during an installation. This FAQ section is designed to give you the confidence to handle those "what if" moments.
Can I Install a Grab Bar Using Only Drywall Anchors?
This is a critical question, and the answer requires clarification. You absolutely cannot use standard plastic wall anchors for a grab bar. Those are designed for light-duty applications like hanging pictures and will fail catastrophically under the load of a person.
However, you can mount a grab bar into a hollow wall if you use a specialized anchoring system engineered specifically for this purpose. These are not your average hardware store anchors.
- Toggle Bolts: A classic and reliable choice. Their spring-loaded "wings" open behind the drywall, distributing the load over a much wider surface area.
- WingIt Anchors: This is a popular brand-name system designed specifically for grab bars, known for its exceptional holding power in hollow wall cavities.
Even with these heavy-duty options, mounting directly into solid wood studs remains the gold standard. If you cannot hit a stud in the ideal location, ensure any anchor system you choose is explicitly rated to support at least 250 pounds of shear force. There are no exceptions to this rule.
What Is the Best Height for a Shower Grab Bar?
ADA guidelines recommend a height between 33 and 36 inches from the shower floor for a horizontal bar. This is an excellent starting point, but it should be adapted for a private home. The best height is whatever is most comfortable and intuitive for the primary user.
The most effective way to determine the ideal height is to have the user stand in the shower (or next to the tub) and reach out naturally as if they were losing their balance. The spot where their hand lands is almost always the perfect placement, as it aligns with their muscle memory in an emergency.
For a vertical bar at the shower entrance, the goal is different. You want to provide a steady handhold as someone steps over the tub curb. Placing the bar so it spans a useful range—for example, from 33 to 48 inches off the floor—makes it accessible for people of varying heights.
How Do I Drill Through Tile Without Cracking It?
Drilling into tile requires the right tools and patience, not brute force.
- Get the Right Bit. This is non-negotiable. You need a glass-and-tile drill bit or a more robust diamond-tipped hole saw. A standard wood or metal bit will slip and likely crack the tile.
- Stop the Slip. Place a piece of masking tape or painter's tape over your mark. This gives the drill bit a surface to grip, preventing it from "wandering" as you start the hole.
- Slow and Steady Wins. Set your drill to a very slow speed and ensure the "hammer" function is turned off. Apply light, steady pressure and let the abrasive bit do the work. Do not force it.
- Keep it Cool. Drilling generates heat, which can crack tile. Dipping the bit in water periodically or using a spray bottle to mist the area will keep it cool and extend the life of your bit.
Once you are cleanly through the tile, you can switch to a standard bit that is appropriate for the material behind it, whether a wood stud or drywall.
When Should I Hire a Professional?
While this guide is designed to empower you to tackle this project yourself, there is no shame in seeking professional help. In fact, it is often the smartest and safest decision.
Consider hiring a qualified handyman or licensed contractor if:
- You are not comfortable or experienced with power tools like a drill.
- Your stud finder is giving you inconsistent readings, and you cannot confidently locate the wall framing.
- You are dealing with difficult wall materials, like a one-piece fiberglass shower surround that requires specialized mounting hardware.
- You simply want the peace of mind that the job is done to the highest safety standard.
A professional installation is a small investment for the certainty that your grab bars will be rock-solid when they're needed most.
At DME Superstore, we are committed to helping you create a safer and more accessible home. From grab bars to walkers and everything in between, we provide the durable medical equipment you need to live with confidence and independence. Explore our full range of bathroom safety solutions today at https://dmesuperstore.com.
Article created using Outrank

